
6 - Introduction to iOS: Part 2
Welcome back. In part one we did some very basic introductory work with project creation. We introducted constraints as well as how to make IBOutlets and IBActions. In this tutorial, we will make a basic “Mad Libs” type application, in which you will be able to type in data and pass values to another screen.
Project Creation
Let’s start this up by creating our project. File > New > Project. Choose Single View Application and name your app. I chose “CrazyLibs”. Original huh?
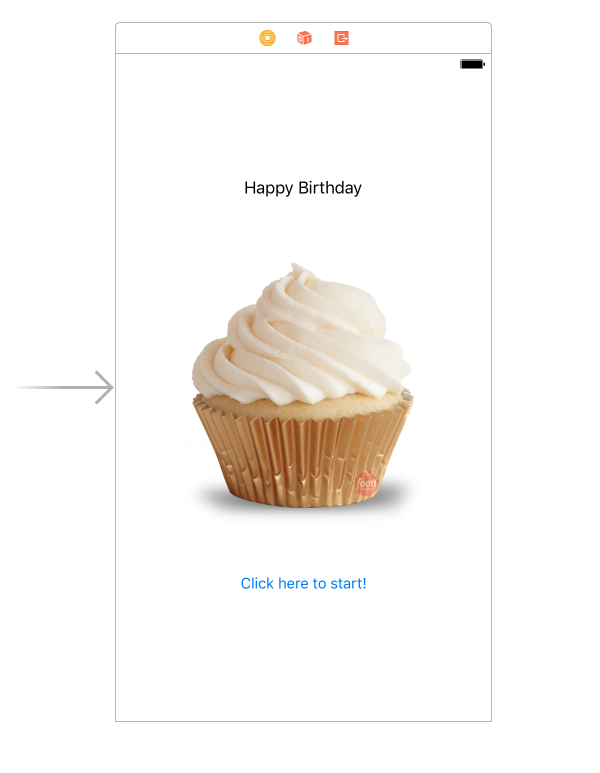
My goal for my application was to make an interactive birthday card for my friend, and so I wanted to create the first page to say Happy Birthday,show a picture of a cupcake, and also have a button saying “Click here to start.” Let’s create that view.
Go to Main.storyboard, and drag a label onto the scene. Also find a picture you would like to put on the scene. Transparent background pictures are the easiest to use. I used this cupcake:

Drag it into your assets, and go back to your Main.storyboard to add an image view to the center of your starting ViewController.
I changed the content mode to Aspect fit, and enlarge the photo to take up most of the center. Below the cupcake, place a button. This is what my app looks like currently:
Now don’t forget we need to add constraints in order to prevent our app from being offset on different devices.
- The Cupcake should be set to exist horizontally and vertically even in the view, as well as have a fixed width and height. I believe you can also to a fixed leading and trailing edge to deal with size on different devices.
- The Happy Birthday label should be horizontally center be set distance from the buttom object (image). I have it set to around 30 pixel distance.
- The Button should also be horizontally center and 30 pixel distance from the top object (image).
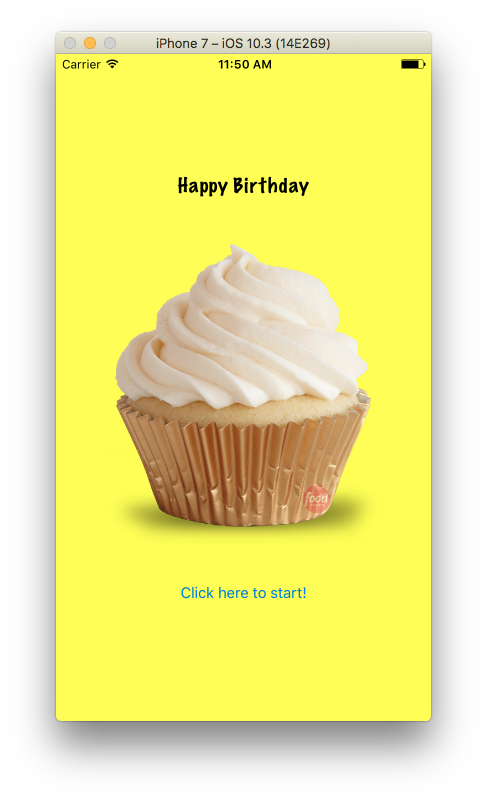
One last thing. Go to your ViewController.swift and add the following in viewDidLoad():
view.backgroundColor = UIColor.yellow
Compile and Run:
Nice. Let’s move on.
Seques
Seques are the movement from one view controller to another. This is pretty much how we switch screens. We want to bring our user to the page in which they will fill out the mad lib section!
To do this we will follow the following steps:
- Go to Main.storyboard
- Drag another View Controller from the object library to the canvas, next to our existing View Controller
- Control-Drag from the button to the new View Controller
- Choose “Show” under Action Seque
- Drag a label to the 2nd View Controller and title it “2nd Screen”
If we run our application, we get the following result after clicking the button!

Congrats, you have created your first seque. Wasn’t too painful was it?
Now let’s create our CrazyLibController page.
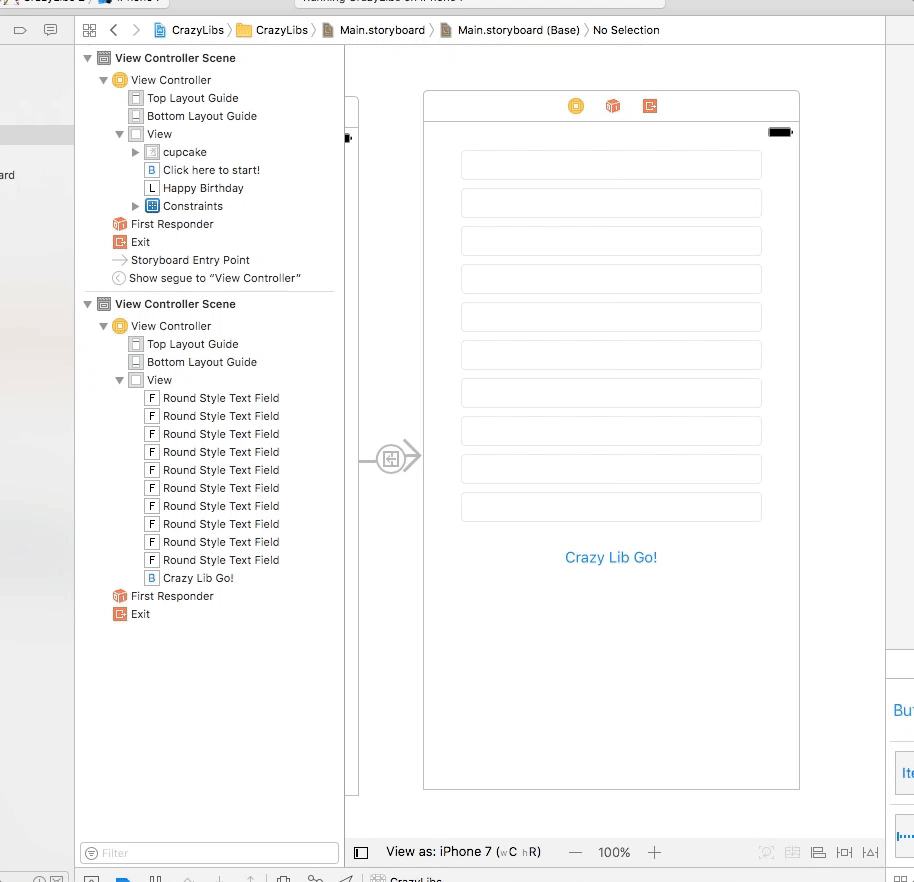
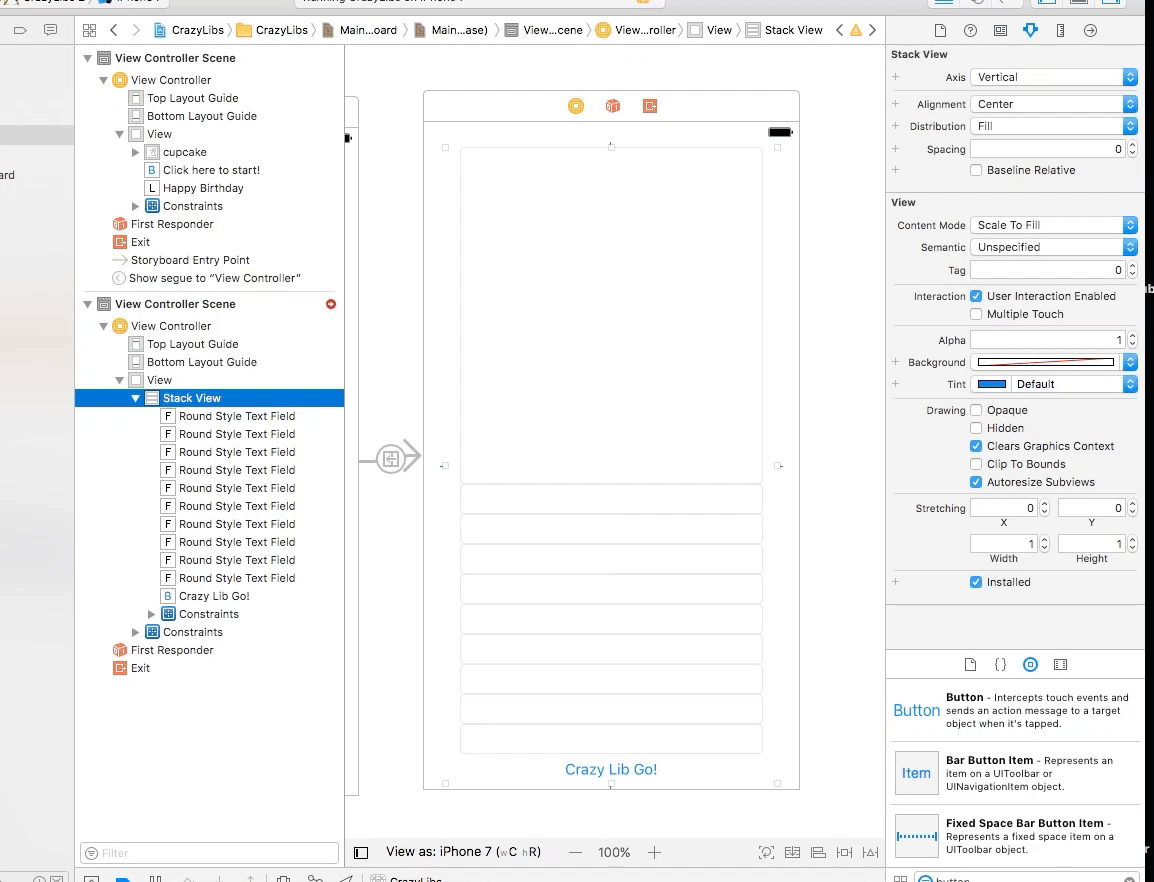
2nd View Controller and Stack View
This new view controller is going to contain all of our text fields for all of the crazy lib word choices. All we have to do is drag a ton of text fields to our view controller from the object library. I dragged 10:

Also add a button below those text fields that says “Crazy Libs Go!”
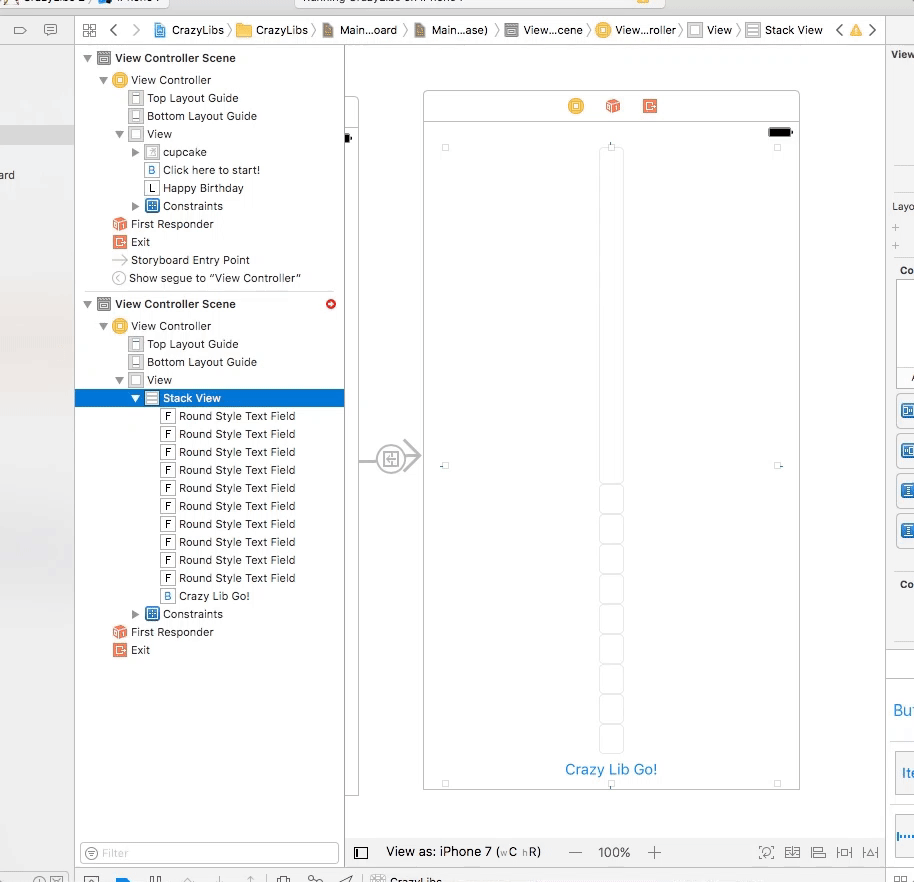
We are going to create what is called a “Stack View.” Stack views are a relatively new concept to iOS in which we can combine a bunch of objects together so that they can have a nice layout. Here’s how we do that:
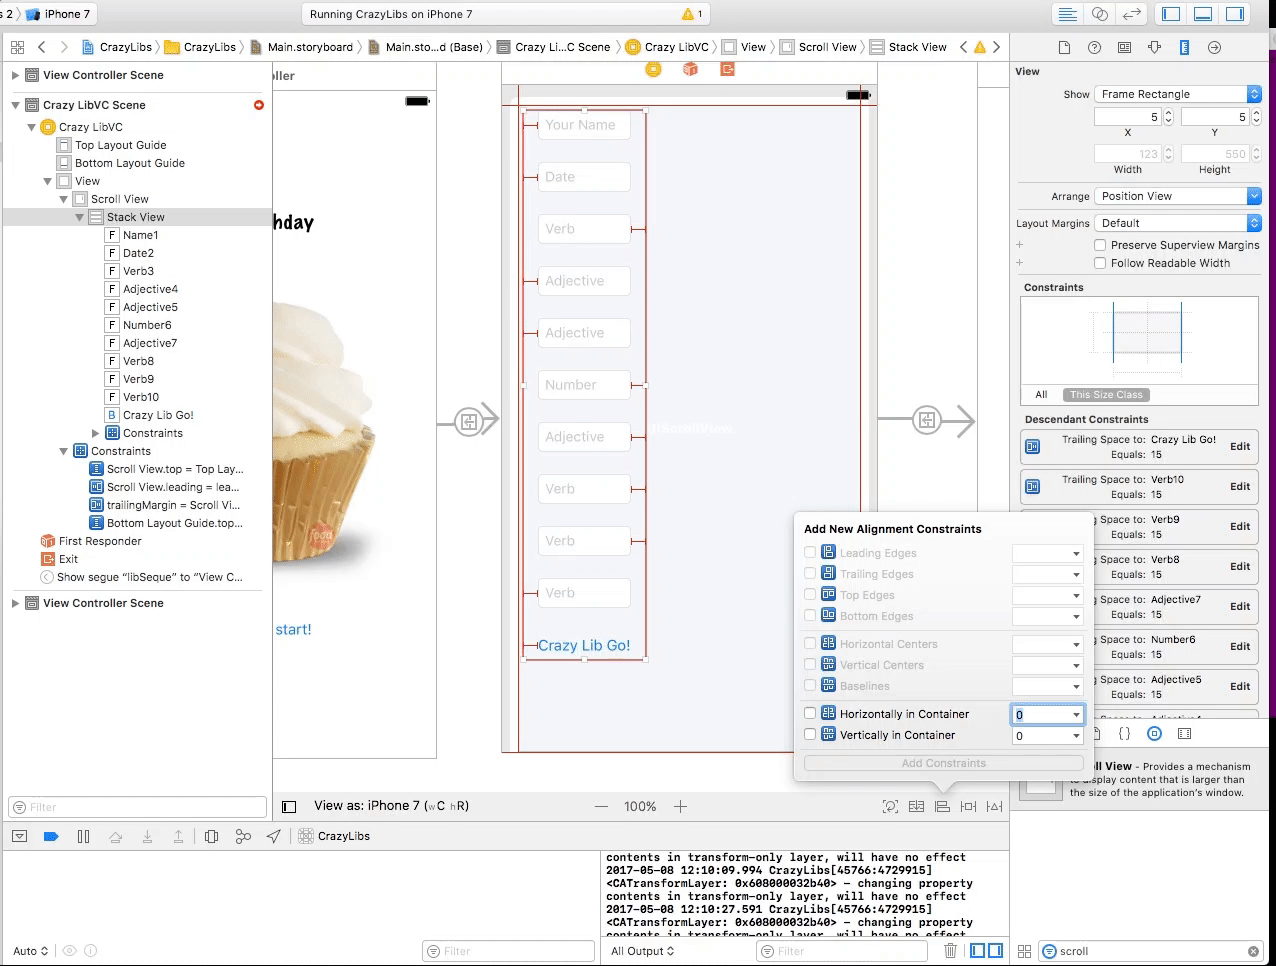
Woah, looks like we need to set our constraints for our newly created stack view. As you can see every object has been placed within this “package”. We can actually assign constraints to the package as a whole:

Ok this still looks pretty weird. For some reason all of the widths of our text fields got smushed. Pretty easy fix for this, we need to set the leading and trailing edge of our text fields and button in our stack view:
Next we can fix the spacing and height sizing of each field by changing the distribution to “Fill Equally” and then adding about 20 points of spacing to the stack view.
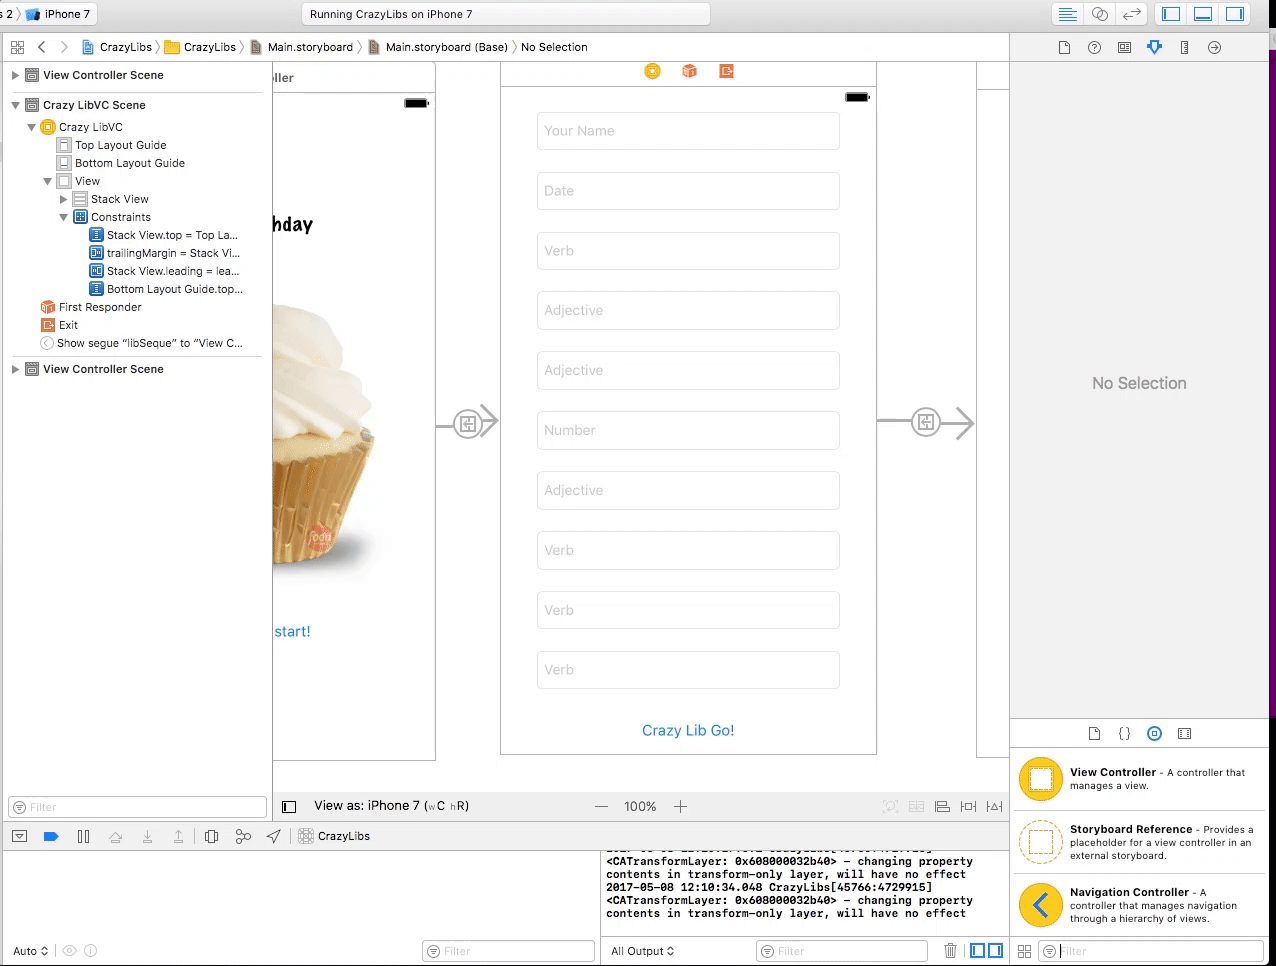
Don’t forget to add placeholder text for each of the text fields . For my mad libs I am going to fill out the following paragraph:
(Name), On (Date) you (Verb) into the world. Today I wish you the (Adjective), (Adjective) birthday! For (Number), you still look (Adjective). Whether you plan to (Verb), or (Verb), no birthday should be without (Verb). Happy Birthday!
10 words to fill out in this order: Name, Date, Verb, Adjective, Adjective, Number, Adjective, Verb, Verb, Verb.
Connecting Storyboard to ViewController
We have now created our second view controller. You may have noticed that our first view controller controls our initial screen, but we do not have another ViewController.swift that controlls our second View Controller in Main.storyboard. We need to create one:
File > New > File > Cocoa Touch Class
Name our new View Controller file “CrazyLibVC” or CrazyLibViewController. Make sure it is of type UIViewController.
Once saved alongside our original ViewController.swift, we should see our CrazyLibVC.swift appear in our project directory structure. All we need to do now is assign our 2nd ViewController in our storyboard to our CrazyLibVC.
Go to Main.storyboard and click on the 2nd View Controller and also go to the Identity Inspector in the right pane. Change the class to CrazyLibVC.
Now we can drag our objects to our CrazyLibVC.swift to create our necessary IBOutlets and IBActions. Go ahead and create IBOutlets for every text field.
This is what my CrazyLibVC.swift looks like now:
//
//  CrazyLibVC.swift
//  CrazyLibs
//
//  Created by Josh Streger on 5/2/17.
//  Copyright © 2017 Josh Streger. All rights reserved.
//

import UIKit

class CrazyLibVC: UIViewController {

    @IBOutlet weak var name1: UITextField!
    @IBOutlet weak var date2: UITextField!
    @IBOutlet weak var verb3: UITextField!
    @IBOutlet weak var adjective4: UITextField!
    @IBOutlet weak var adjective5: UITextField!
    @IBOutlet weak var number6: UITextField!
    @IBOutlet weak var adjective7: UITextField!
    @IBOutlet weak var verb8: UITextField!
    @IBOutlet weak var verb9: UITextField!
    @IBOutlet weak var verb10: UITextField!


    override func viewDidLoad() {
        super.viewDidLoad()

        // Do any additional setup after loading the view.
    }

    override func didReceiveMemoryWarning() {
        super.didReceiveMemoryWarning()
        // Dispose of any resources that can be recreated.
    }

    /*
    // MARK: - Navigation

    // In a storyboard-based application, you will often want to do a little preparation before navigation
    override func prepare(for segue: UIStoryboardSegue, sender: Any?) {
        // Get the new view controller using segue.destinationViewController.
        // Pass the selected object to the new view controller.
    }
    */
}
Testing and Bug Identification
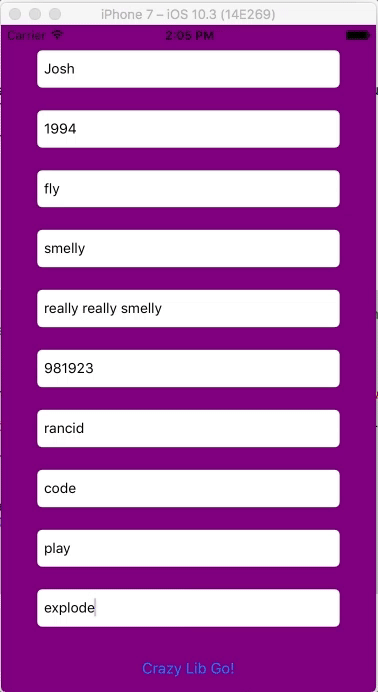
It is important that during development of our application we analyze how our app is running. The main point is to add the necessary functionalities, but if bugs affect our application and prevent users from utilizing the primary functions, then we need to prioritize resolving those issues before moving on. When you run your application check out the page in which you type in your words.
Assuming that you are using the Simulator to run your application, Go into Hardware > Keyboard and disable “Connect Hardware Keyboard.” We want to run this application as if it is a real device (In fact if you are able to, I suggest running it a device as well as different devices in the simulator).
This keyboard disable just lets us use the keyboard in the device instead of using our computer’s keyboard. The main issues here is with the kayboard and textfields:
- Pressing return does not exit out of the keyboard
- Pressing outside of the textfields while the keyboard is open does not close the keyboard
- When you click on a field to edit, the keyboard pops up and block the bottom 4 textfields along with the button
Let’s fix these one by one.
UITextFieldDelegate
In order to tell our keyboard to go away from hitting return, we need to “teach” our text fields to have that property. Everything in our application is a class that we can add properties to and change behaviors. In order to edit the behaviors of a keyboard when our textfields are being used, we need to incorperate a delegate.
import UIKit

class CrazyLibVC: UIViewController, UITextFieldDelegate {

    @IBOutlet weak var name1: UITextField!
    @IBOutlet weak var date2: UITextField!
    @IBOutlet weak var verb3: UITextField!
    @IBOutlet weak var adjective4: UITextField!
    @IBOutlet weak var adjective5: UITextField!
    @IBOutlet weak var number6: UITextField!
    @IBOutlet weak var adjective7: UITextField!
    @IBOutlet weak var verb8: UITextField!
    @IBOutlet weak var verb9: UITextField!
    @IBOutlet weak var verb10: UITextField!

    override func viewDidLoad() {
        super.viewDidLoad()
        view.backgroundColor = UIColor.purple
        let textArray:[UITextField] = [name1, date2, verb3, adjective4, adjective5, number6, adjective7, verb8, verb9, verb10]

        for i in textArray {
            i.delegate = self
        }
    }

    override func didReceiveMemoryWarning() {
        super.didReceiveMemoryWarning()
    }

    func textFieldShouldReturn(_ textField: UITextField) -> Bool {
        self.view.endEditing(true)
        return false
    }
}
What we have done here is extend our CrazyLibVC by another class: UITextFieldDelegate. This delegate contains functions that we can use for our text field behaviors! One of the functions that we use from TextFieldDelegate is textFieldShouldReturn. In that function we tell the view to end the editing and return.
The last step is to tell all of our text fields to use this extended delegate. In the viewDidLoad function I have created an array containing all of my text fields, and I loop through each textField and set their property “delegate” to equal self. This should do the trick
Gesture Recognizers
Gesture Recognizers are ways for touch events to be considered as triggers for custom functions. In this particular solution to bug #2, we want to create a Gesture Recognizer that will notice when a tap is executed on the view (not the text fields or the button), and will dismiss the keyboard.
Add the following after the last function we added in the CrazyLibVC class:
func hideKeyboardWhenTappedAround() {
    let tap: UITapGestureRecognizer = UITapGestureRecognizer(target: self, action: #selector(CrazyLibVC.dismissKeyboard))
    view.addGestureRecognizer(tap)
}

func dismissKeyboard() {
    view.endEditing(true)
}
We are doing the following:
- Creating a function called hideKeyboardWhenTappedAround(), and within we are saying to create a UITapGestureRecognizer in which when executed will execute our function in our class called “dismissKeyboard”. We then add that TapGestureRecognizer to the view.
- We add our dismissKeyboard which simply ends the editing
Run again that’s bug #2 squashed.
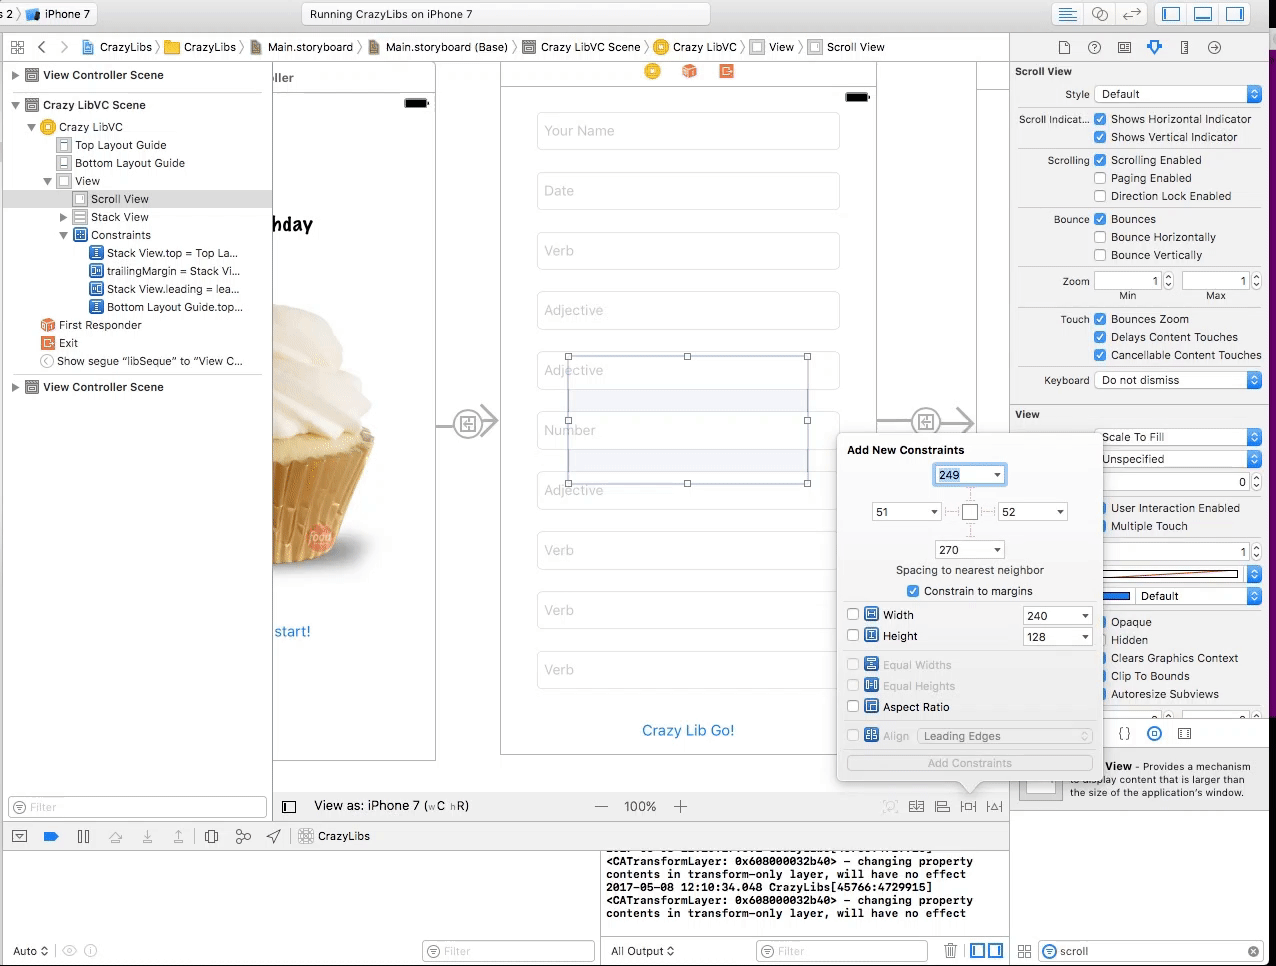
Scroll View
Ok our next bug isn’t so simple to fix. We are going to be animating our view when the keyboard opens. This means that we want to calculate how much the view should move up based on where we touch, and then scroll the view up to match that distance while also incorperating keyboard height.
There are methods that individuals use which seem simpler and may be appropriate for other situations, but because we have a lot of meat on our CrazyLibVC I believe this is a great opportunity to use a ScrollView.
If you haven’t noticed already, our Main.storyboard has a heirarchy structure itself. Our CrazyLibVC contains a view, which contains our stack view, which contains all of our objects. This is why we can call view.whatever in our CrazyLibVC.
We are going to add another intermediate piece to this structure.
Bring the scroll view to the same level as the stack view:
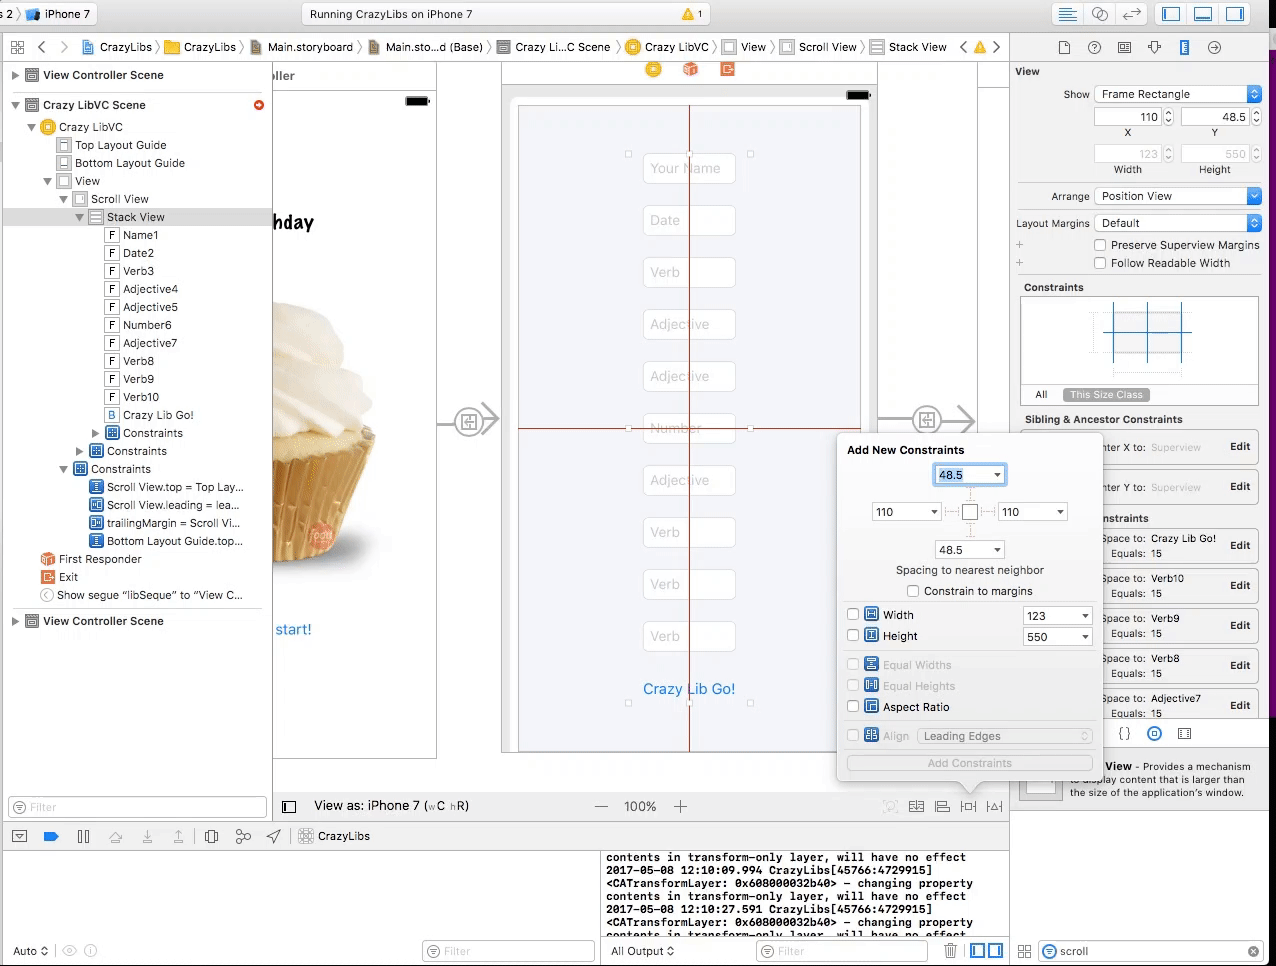
Put some constraints on our scroll view:
Bring our stack view inside of our scroll view:
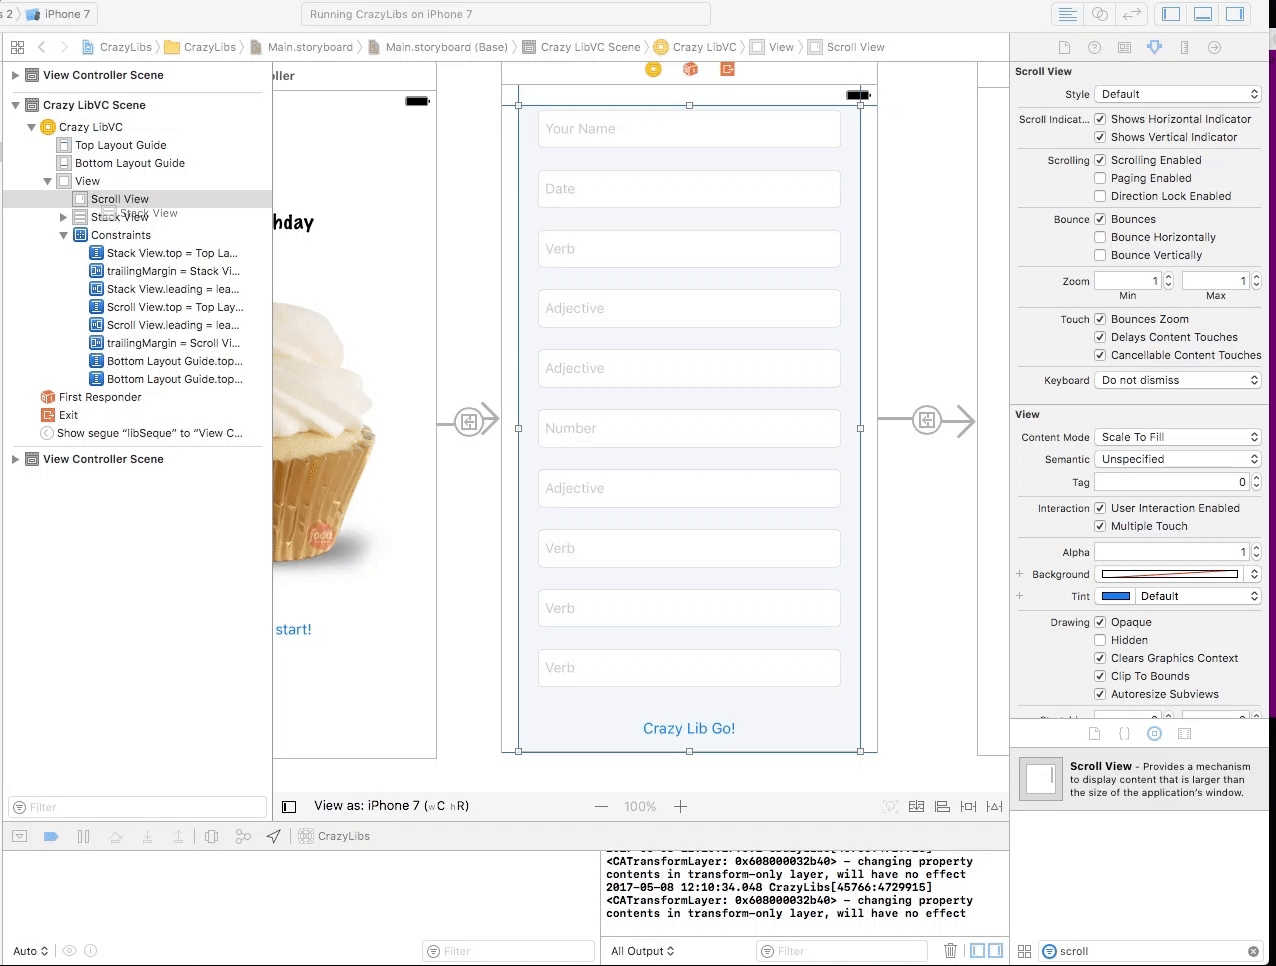
Fix constraints:
Additionally, drag an IBOutlet for the scroll view onto our CrazyLibVC for later use. If we run the application again there shouldn’t be any issues.
Next we need to set our scrollView content settings in our code. In CrazyLibVC we are going to place this logic in a new function:
override func viewDidAppear(_ animated: Bool) {
    scrollView.contentSize = CGSize(width: view.frame.size.width, height:view.frame.size.height)
    scrollView.clipsToBounds = false
}
viewDidAppear is a builtin that performs logic after the scroll view has been placed.
Next add these two functions:
func keyboardWillShow(notification:NSNotification){
    var userInfo = notification.userInfo!
    var keyboardFrame:CGRect = (userInfo[UIKeyboardFrameBeginUserInfoKey] as! NSValue).cgRectValue
    keyboardFrame = self.view.convert(keyboardFrame, from: nil)

    var contentInset:UIEdgeInsets = scrollView.contentInset
    contentInset.bottom = keyboardFrame.size.height
    scrollView.contentInset = contentInset
}

func keyboardWillHide(notification:NSNotification){
    let contentInset:UIEdgeInsets = UIEdgeInsets.zero
    scrollView.contentInset = contentInset
}
Ok that was a lot. Here’s what we did:
- Set the content size of the scroll view equal to the view width and height when the view appears
- Created a function that sets a content inset of the scroll view equal to the keyboard frame when the keyboard shows
- Created a function that sets the content inset of the scroll view to 0 when the keyboard hides.
Lastly, we need to make our view controller follow these rules by placing identifiers within our viewDidLoad():
NotificationCenter.default.addObserver(self, selector: #selector(keyboardWillShow), name:NSNotification.Name.UIKeyboardWillShow, object: nil)

NotificationCenter.default.addObserver(self, selector: #selector(keyboardWillHide), name:NSNotification.Name.UIKeyboardWillHide, object: nil)
We now have a pretty nice working UI.
Passing Data In Seque
What we want to do next is have a seque in which when we press “Crazy Lib Go!” we want a new page to come up with our Libbed Paragraph. This requires passing this paragraph to the new page. Lets create a basic seque from our button to a new view controller.
Drag a new view controller to the scene in Main.storyboard and then Control-Drag our button to the scene to create our Seque. Show is fine.
Before we move on, click the actual seque itself, and in the Attributes Inspector,change the Seque ID. You can change it to whatever you like, but this is the identifier that we are going to use to send our data through. I have named mine “libSeque”.
Let’s create our IBAction with our button. Also create a new Cocoa Touch Class file to pair with our new view controller. I have named mine “FinalVC”. Go to Main.storyboard and change the identifier of our new View Controller to be paired with FinalVC.
Lastly place a text view on the last VC in Main.storyboard. Text views are similar to labels but they can contain more text. I set up some contraints so that the text view was in the center of the screen. I also set the text to be floating in the center of the text view. I also made the text non-editable, but left it selectable. Create an IBOutlet of this text in our FinalVC. This is the final code I have in my FinalVC:
import UIKit

class FinalVC: UIViewController {

    @IBOutlet weak var textView: UITextView!

    private var _message:String!

    var message: String {
        get {
            return _message
        } set {
            _message = newValue
        }
    }

    override func viewDidLoad() {
        super.viewDidLoad()
        view.backgroundColor = UIColor.yellow
        textView.text = _message
    }

    override func didReceiveMemoryWarning() {
        super.didReceiveMemoryWarning()
    }
}
I have created a private variable named _message which is going to store our final birthday message with all of our data inserted. The variable message has a getter and setter to take in a newValue and set our private variable to it. viewDidLoad() simply sets our text view to display our message. All we need to do now is pass data via seque.
Create an IBAction from our go button in CrazyLibVC. I named by action “buttonPressed”. The following code is the last piece of the puzzle:
/*
    (Name), On (Date) you (Verb) into the world. Today I wish you the (Adjective), (Adjective) birthday! For (Number), you still look (Adjective). Whether you plan to (Verb), or (Verb), no birthday should be without (Verb). Happy Birthday!
    */

@IBAction func buttonPressed(_ sender: Any) {
    let message = name1.text! + ", " + "On " + date2.text! + " you " + verb3.text! + " into the world. Today I wish you the " + adjective4.text! + ", " + adjective5.text! + " birthday! For " + number6.text! + ", you still look " + adjective7.text! + ". Whether you plan to " + verb8.text! + ", or " + verb9.text! + ", no birthday should be without " + verb10.text! + ". Happy Birthday!"

    performSegue(withIdentifier: "libSeque", sender: message)
}

override func prepare(for segue: UIStoryboardSegue, sender: Any?) {
    if let destination = segue.destination as? FinalVC {
        if let message = sender as? String {
            destination.message = message
        }
    }
}
In our buttonPressed function we are extracting out all of the inputted data in our MadLibVC text fields and placing it into a constant. We then call our function performSeque using the same identifier (libSeque) that we gave our Seque. We also add message as a sender. We also added another override function for prepare (which is used specifically for seque) which does the following:
If the destination is of class “FinalVC” then let a constant contain the sender as a string and set our destination VC’s message to that string.
Here’s the final product:
Ok maybe the wording is a little weird. But congrats on your second, and definitely more complicated application ;)