How to make some MEAN CRUD
Hello all. So during my last semester of college I decided to take a class on Secure Web Application Software Development. In this course we do crash sessions on web dev, followed up with topics in security. I’ve never been much of a web developer up until I decided to start this blog, but that doesn’t count too much since I am using a jekyll template for this website.
One of our projects was to create a forum. The forum would be a simple topic board. In order to view the topics, users would have to create an account. Once authenticated, users can go into topics and view comments. They should also be able to post, update, and delete comments that they have made themselves. Simple enough? We got to choose to build this project using LAMP (Linux, Apache, MySQL, PHP) or MEAN (MongoDB, Express, AngularJS, NodeJS). Obviously, I’m a pretty mean guy.
Well, actually I’m not. I’m completely new to Angular, Express, and Node. After reading tutorial upon tutorial while slugging through this project, I’ve decided to write a… tell all? Well rather just a very thorough tutorial on how I did this project. While there are a ton of MEAN stack generators out there that were tempting to use, this is all from scratch.
The Tutorial
Ok so this is a pretty long tutorial. I debated splitting this up into seperate articles (which is what I might do in the future if I decide to go futher in depth with each step). For now I will do breif overviews of what I did, and explain where needed.
Introduction
I created the project as a Cloud9 project. If you don’t know what Cloud9 is, its an awesome online IDE. Built in Ubuntu and all. If you aren’t using Cloud9, make sure that you have Node installed.
Downloading MongoDB
The M in MEAN stands for MongoDB. Mongo is a free and open-source cross-platform document-oriented database program. Classified as a NoSQL database program, MongoDB uses JSON-like documents with schemas. It’s pretty simple to use, and even simpler to install:
Linux:
$ sudo apt-get install mongodb-org
OSX (Homebrew):
$ brew update
$ brew install mongodb
If you have never had Mongo running before, you need to make sure you have the right folder to store your databases, or else the program won’t run (beware you may have to mess with permissions depending on your filesystem’s config).
$ mkdir -p /data/db
Coolio, now we can spin up our database with the following command:
$ mongod --smallfiles --syslog --fork
Beautiful, moving right along.
The Project Scheme
Here is how the organization of our files are going to look at the end of the project. Many people have different ways they organize their files, this is just how I did it (and what makes the most sense to me).
- app
|   |- controllers/
|   |   |- auth.js
|   |   |- comment.js
|   |   |- topic.js
|   |   |- user.js
|   |- models/
|   |   |- comment.js
|   |   |- topic.js
|   |   |- user.js
|   |- routes/
|   |   |- auth.js
|   |   |- comment.js
|   |   |- topic.js
|   |   |- user.js (not exactly needed);
- client
|   |- css/
|   |   |- a bunch of stuff lol
|   |- img/
|   |   |- unneccessary images
|   |- js
|   |   |- controllers/
|   |   |- services/
|   |   |- app.js
|   |   |- routes.js
|   |- libs
|   |   |- lots of libraries yay
|   |- views
|   |   |- a bunch of views
|   |- index.html
- config
|   |- config.js
- node_modules
- bower.json
- package.json
- server.js
Ok DEFINITELY DON’T make all of the folders for this yet. We’re going to start from scratch.
NodeJS and Express
We are going to be using node and a bunch of dependencies. This means that we are going to need a server.js file.
If you don’t have node:
$ brew install node
Now Express is a web framework for NodeJS, and it is excellent. So we are going to use it. To start getting dependencies into our project we can either have a fully stacked up package.json file or we can have a minimal one and build it up from there. Let’s start with no dependencies. Create the file:
{
  "name": "forum-example",
  "version": "0.0.0",
  "description": "A forum example to showcase an Authentication MEAN stack with CRUD capabilities",
  "main": "server.js",
  "private": true,
  "licence": "UNLICENSED",
  "author": "Joshua Streger <jdstreger@gmail.com>",
  "dependencies": {
  }
}
You can customize this file to whatever you please, just make sure that the main is pointing to your server.js file. Now to download express:
$ npm install express --save
If you look you should have express dependency in your package.json file.
Now let’s spin up a simple express server:
// server.js
// Joshua Streger

// Dependencies
var express = require('express');
var http = require('http');

// Create our express app
var app = express();

// Create our router
var router = express.Router();

// Create our simple response
router.get('/', function(req, res) {
	res.json({message: "Hello, World!"});
});

// Tell our app to use our router.
app.use(router);

// Create our server using our app
var server = http.createServer(app);

// Tell our server to listen to requests
var ip = process.env.IP || "0.0.0.0";
var port = process.env.PORT || 3000;

server.listen(port, ip, function(){
	var addr = server.address();
	console.log("Generic server listening at", addr.address + ":" + addr.port);
});
Now all we have to do is run the following:
$ node server.js
If it runs properly, then we should be able to visit to where our program is running and see the following message:
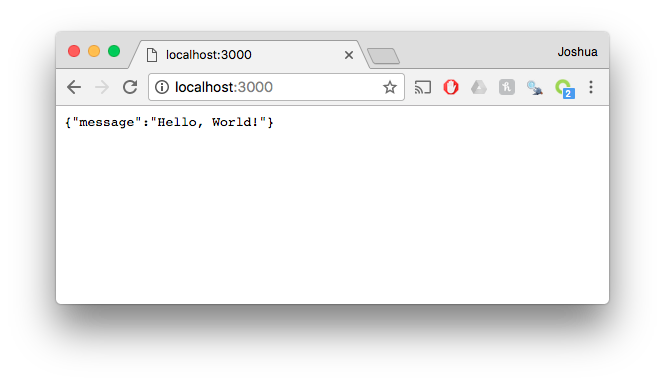 Beautiful.
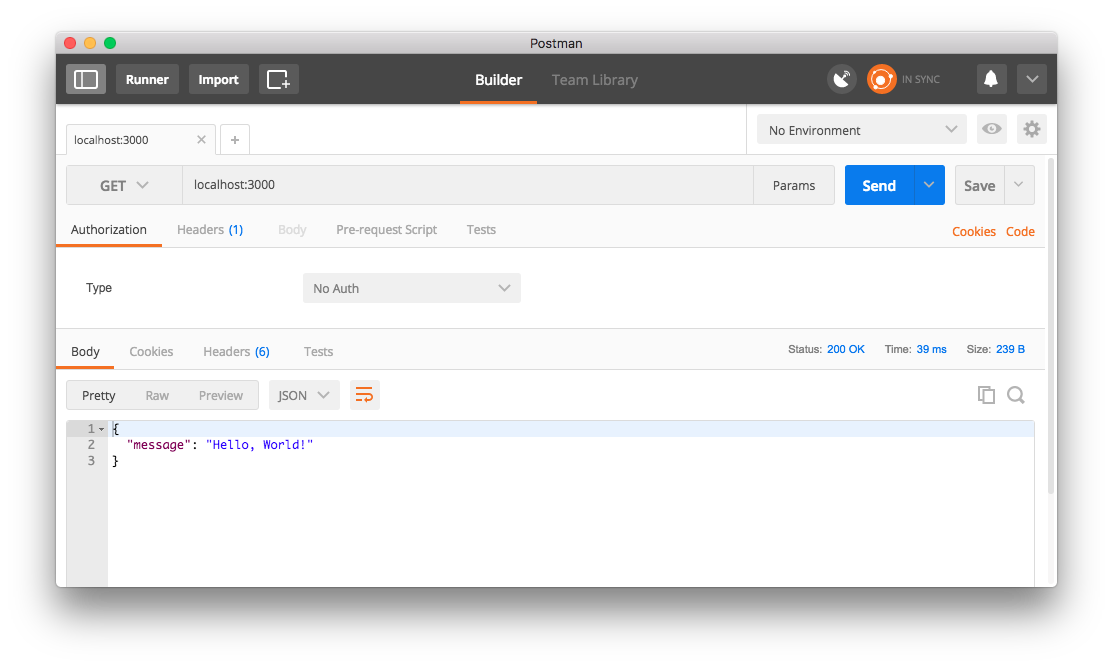
Postman
In order to do testing, we need to use Postman. Postman is an incredible app that allows us to send requests to our app, nice and simple. You can download the application to your local, or even use it as a Google Chrome plugin.
Once you’ve downloaded Postman you can test it out by sending a GET request to our app’s server:
CRUD, Mongoose, and Routes
Looking towards what we want to get out of our “forum”, we want users to be able to create topics that add to the database. That’s where CRUD comes in. No, CRUD is not a substance that is disgusting or unpleasant, in this case anyway. CRUD stands for Create, Read, Update, Delete (or Destroy, if you will). They are the basic functions of persistent sorage.
Storage refers to a database, which means that we need to use our MongoDB that we have running. If only we had something that could connect our NodeJS project to our database… lmao check out Mongoose:
$ npm install mongoose --save
This is arguably the most important section of our project: we need to create the models for the data that we want to store in our datbase, we need to be able to Create, Read, Update, and Delete the records for this data, and we need to be able to do all of that through sending requests to our running app.
Create a new folder called app at the root directory of the project.
Models
Within our app folder, create a new folder called models. Within our model folder, create a new file called topic.js.
Our project structure should now look like this:
- app
|   |- models/
|   |   |- topic.js
- node_modules
|   |   |- A bunch of stuff
- package.json
- server.js
This is what our topic.js file looks like:
// app/models/topic.js
// Load Mongoose Dependency
var mongoose = require('mongoose');

// Create the schema for our topic model
var TopicSchema = new mongoose.Schema({
    title: {type: String, required: true, index: {unique: true}},
    category: {type: String, required: true}
});

// export our model so it can be used elsewhere
module.exports = mongoose.model('Topic', TopicSchema);
In this file we are using the mongoose dependency to create a schema for our Topic model. Our topic schema has 2 fields at the moment: a title and a category. Both of these fields are of type String, and they are both required, meaning that we can create a new Topic that doesn’t have a title or a category. Only the title is unique, meaning that we cannot create two titles of the same name, but you can create multiple topics of the same category.
Controllers
Within our app folder, create a new folder called controllers. Within our controllers folder, create a new file called topic.js.
Our project structure should now look like this:
- app
|   |- models/
|   |   |- topic.js
|   |- controllers/
|   |   |- topic.js
- node_modules
|   |   |- A bunch of stuff
- package.json
- server.js
So our model is what defines the fields of our Topic object. The controller is designed to hold the functions that allow create, read, update, and destroy to occur. Here’s what the file looks like:
// app/controllers/topic.js

// Import our topic model
var Topic = require('../models/topic');

// postTopic: creates a Topic and inserts into database
exports.postTopic = function(req, res){
    var topic = new Topic();
    topic.title = req.body.title;
    topic.category = req.body.category;

    topic.save(function(err) {
        if(err){
            res.send(err);
            return;
        }
        res.json({message: 'Topic added to database', data: topic});
    });
};

// getTopics: gets every topic in database
exports.getTopics = function(req, res) {
    Topic.find(function(err, topics) {
        if(err) {
            res.send(err);
            return;
        }
        res.json(topics);
    });
};

// getTopic: only gets topic of the particular topic_id
exports.getTopic = function(req, res) {
    Topic.findById(req.params.topic_id, function(err, topic) {
        if(err){
            res.send(err);
            return;
        }
        res.json(topic);
    });
};

// putTopic: updates a topic of given topic_id
exports.putTopic = function(req, res) {
    Topic.update({_id: req.params.topic_id}, { title: req.body.title, category: req.body.category }, function(err, num, raw){
        if(err){
            res.send(err);
            return;
        }
        res.json({message: num + ' updated'});
    });
};

// deleteTopic: deletes a topic of given topic_id
exports.deleteTopic = function(req, res){
    Topic.remove({_id: req.params.topic_id }, function(err){
        if (err){
            res.send(err);
            return;
        }
        res.json({message: 'Topic removed from database'});
    });
};
As you can see, in our code we have written functions to accomodate CRUD. Now all we need to do is link it with our app.
Routes
Within our app folder, create a new folder called routes. Within our routes folder, create a new file called topic.js.
Our routes folder will hold all of our routes for our router. We don’t want to mix up any routes so it is important to keep this organized. Here is what our file is going to look like:
// Import our dependencies and create our router for topics
var express = require('express');
var router = express.Router();

// Import our topic controller
var topicController = require('../controllers/topic');

// create /topics route
router.route('/topics')
    .post(topicController.postTopic)
    .get(topicController.getTopics);

// create /topics/:topic_id route
router.route('/topics/:topic_id')
    .get(topicController.getTopic)
    .put(topicController.putTopic)
    .delete(topicController.deleteTopic);

exports.topicRouter = router;
In this file we are creating a new router with two seperate routes. One for posting a topic and getting all topics, and one for getting, updating, and deleting a particular topic, hense the addition of the topic_id
Our last step is editing our server.js file to incorporate our app’s routes. We need to include mongoose and start up a connection with our mongodb. We also need to download and include another dependency: body-parser. This will allow our application to read the body contents of requests.
$ npm install body-parser --save
// updated server.js

// Dependencies
var express = require('express');
var http = require('http');
var mongoose = require('mongoose');
var bodyParser = require('body-parser');

// Create our mongo connection
mongoose.connect('mongodb://localhost:27017/forum-example');

// Create our express app
var app = express();

// Create our router
var router = express.Router();

// Import our Routers
var topicRouter = require('./app/routes/topic');

// Tell our app to use our dependencies
app.use(bodyParser.urlencoded({ extended: true }));
app.use(bodyParser.json());

// tell our router to use our imported routes
router.use(topicRouter.topicRouter);

// Create our simple response
router.get('/', function(req, res) {
	res.json({message: "Hello, World!"});
});

// Tell our app to use our router ON THE API ROUTE
app.use('/api', router);

// Create our server using our app
var server = http.createServer(app);

// Tell our server to listen to requests
var ip = process.env.IP || "0.0.0.0";
var port = process.env.PORT || 3000;

server.listen(port, ip, function(){
	var addr = server.address();
	console.log("Generic server listening at", addr.address + ":" + addr.port);
});
Make sure that you’re running mongod before you start your server.
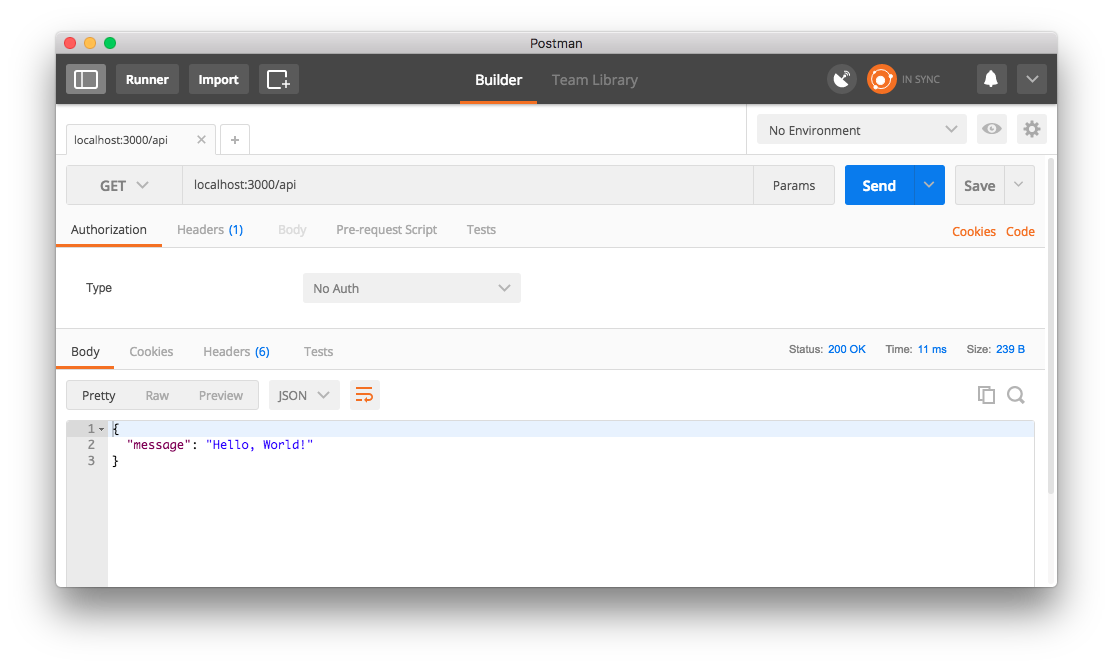
Notice that we have changed our app to use the main router on the “/api” route. This means that instead of requesting localhost:3000 to receive “Hello, World!”, we are actually requesting localhost:3000/api, like so:
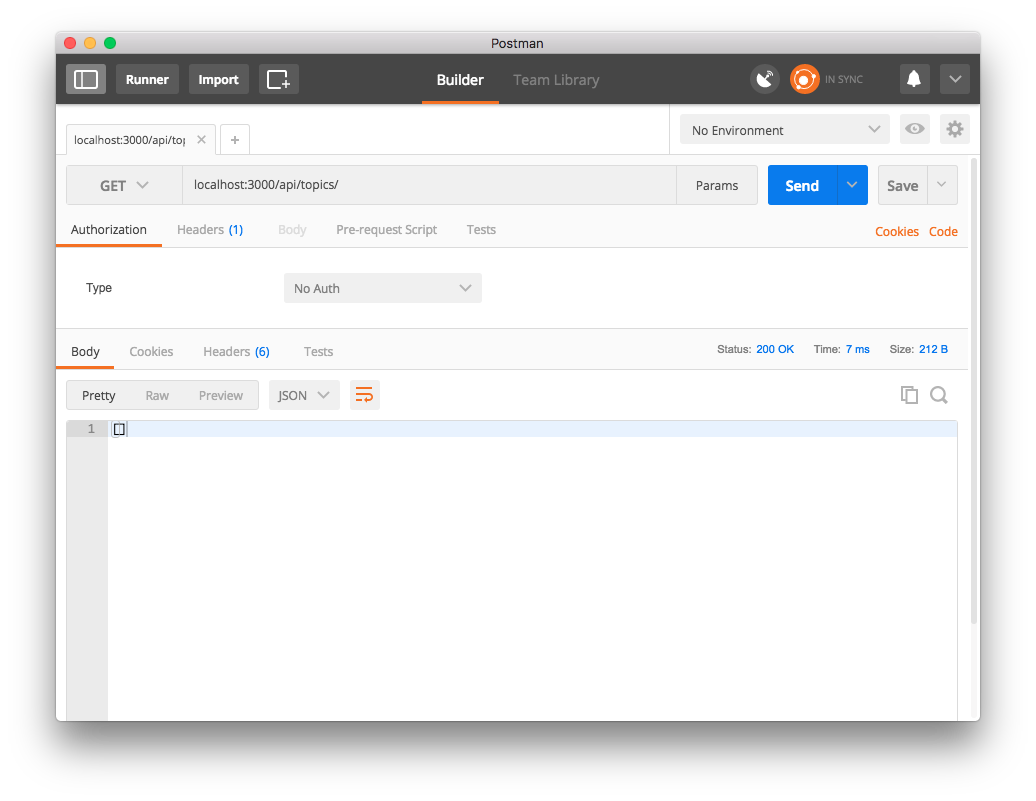
Now we should be able to use our topic routes as well. Let’s send a get request to /api/topics:

Ok so we receive an empty array, which is good since we haven’t inserted any Topics into our database. Let’s send a post request to api/topics with a body containing values of the title and category of the Topic we want to create:
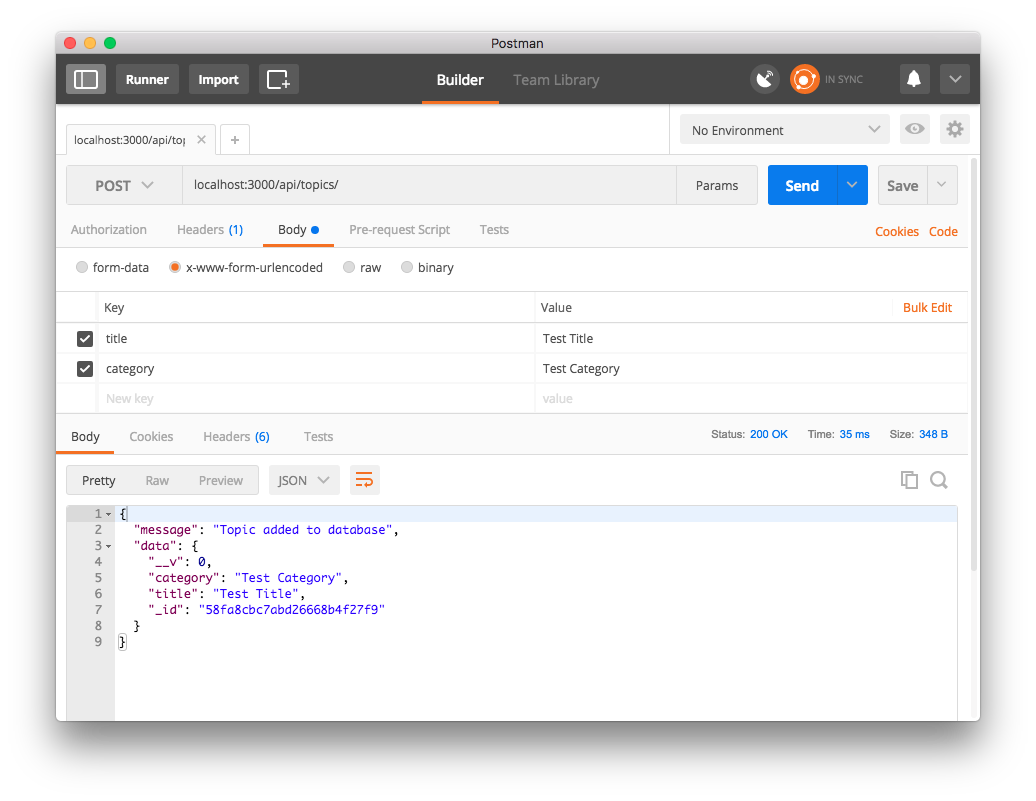
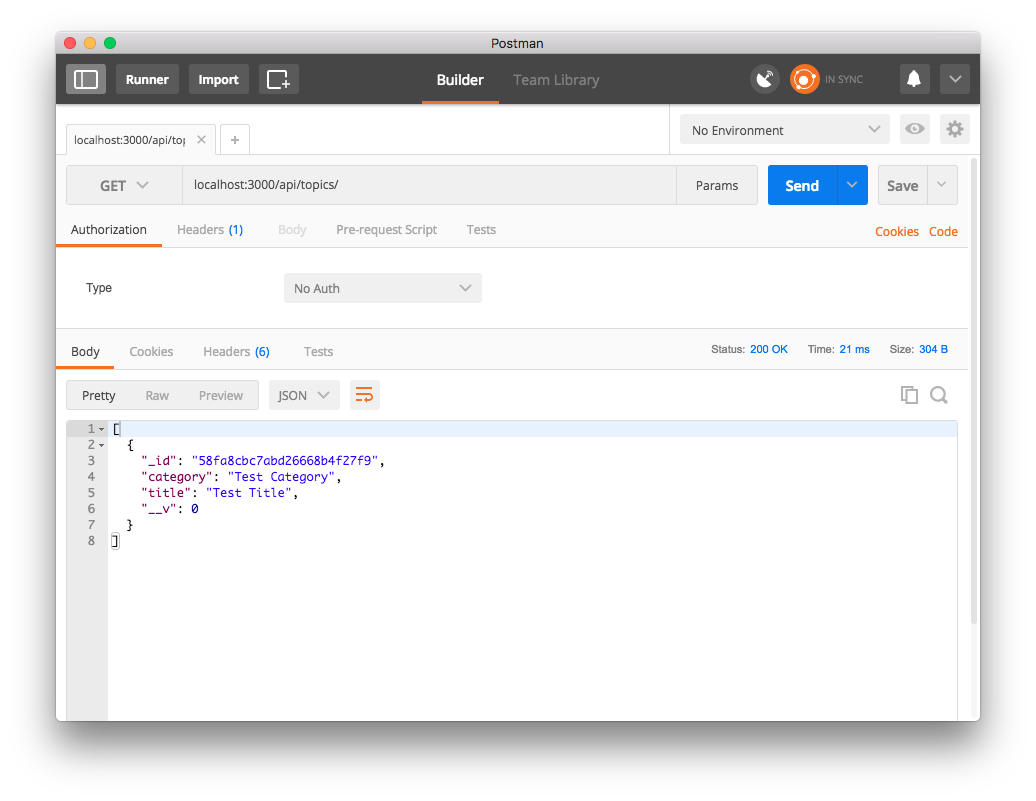
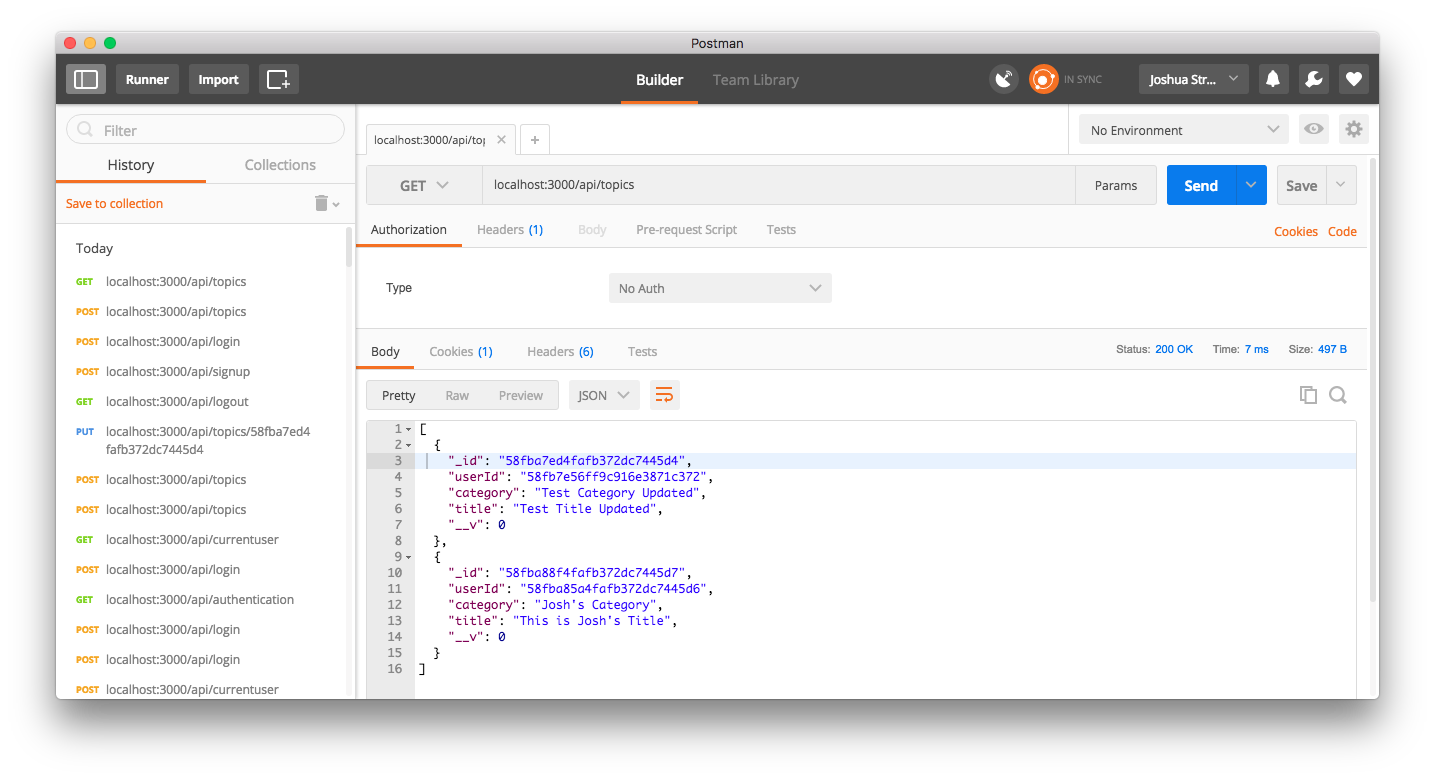
We have inserted a topic! Now when we send a get request we should see all of our topics:
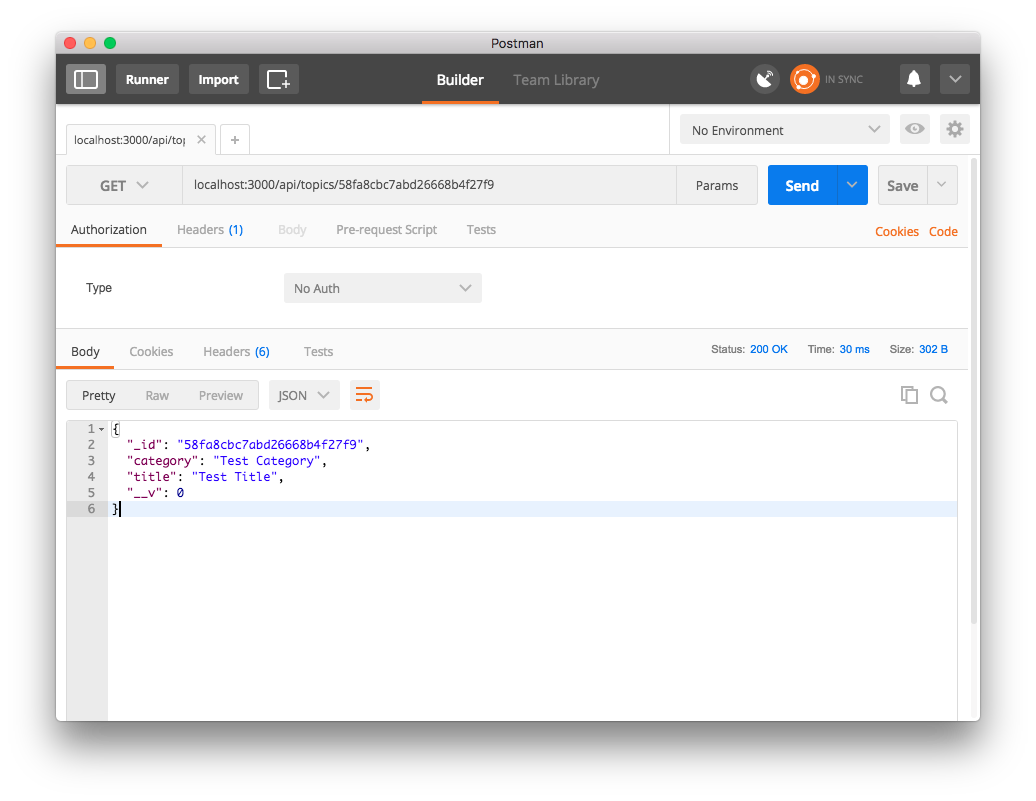
We can also update and delete the topic. For Getting/Updating/Deleting of a particular topic, we need to include topic_id in the url we are requesting. In our initial get request we can see the _id’s for all of our topics. Take the id and place it at the end of the url like so:
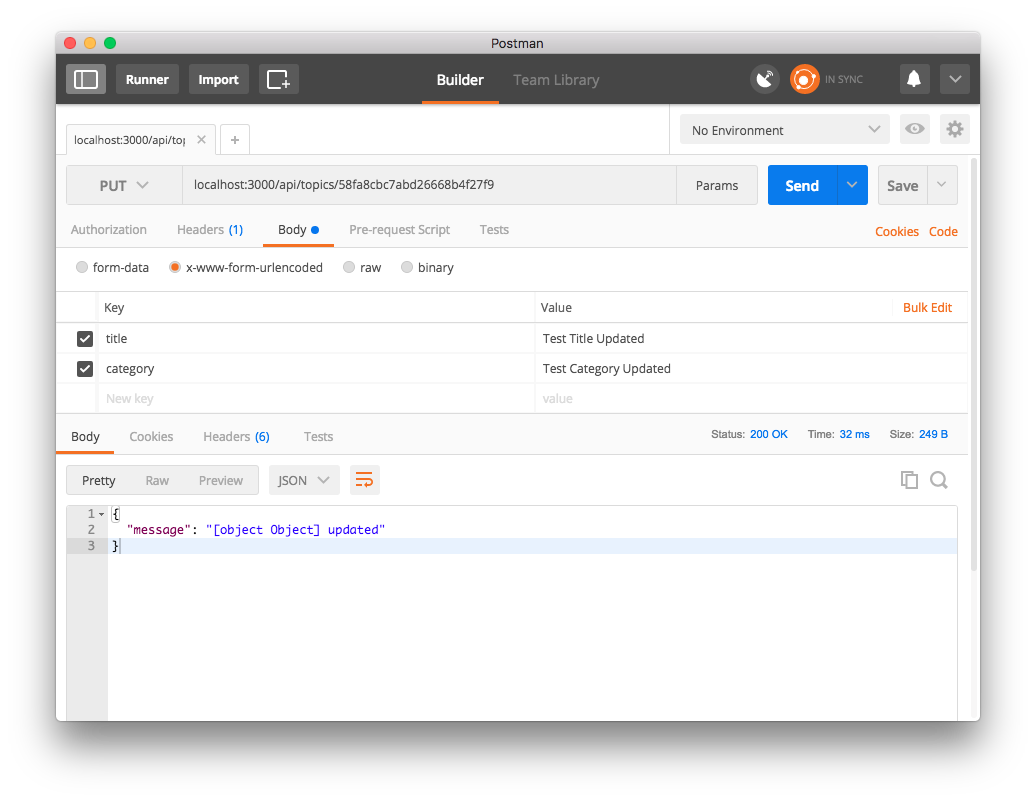
Using this url with the appropriate topic_id, we can send a put request with different body values for title and cateogory to update the record:
When we get again we can see that the record has changed:

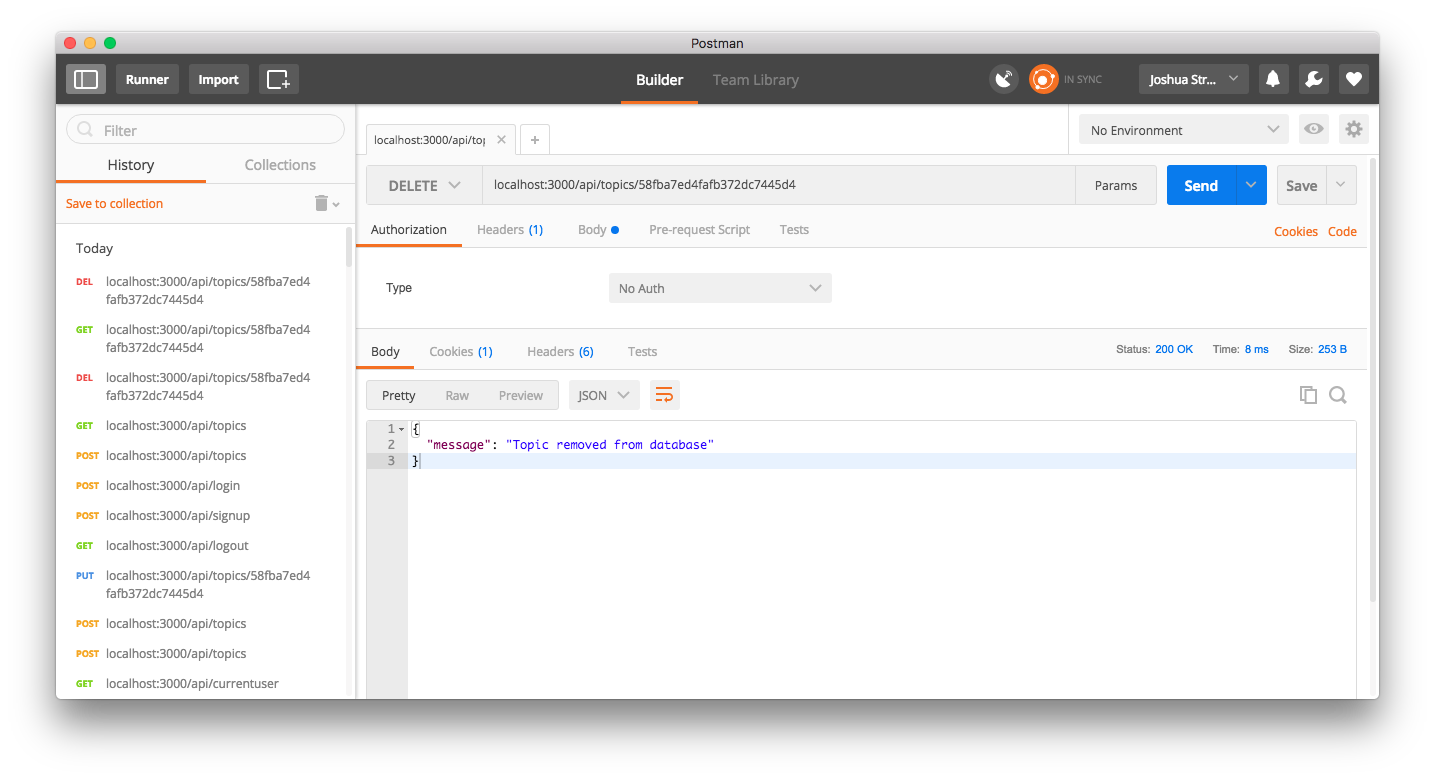
Now we delete it:
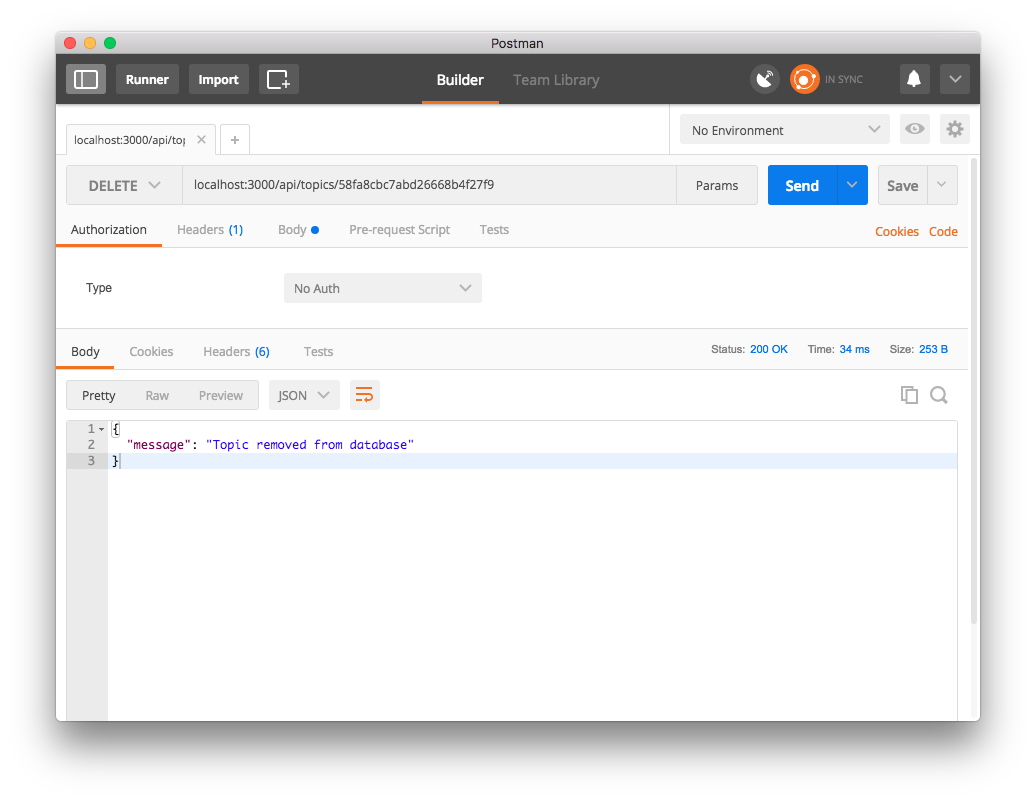
We can see we don’t have it in the database any longer:
Ok we have our topic route all set. Now it’s time to get into another model: User.
Users and Authentication
So we have created our topic model, but the point of the topics is so that users can create them. Here’s what we want to do:
- Create the User model
- Create an authentication system for a User
- Set routes to allow login, logout, signup, and check to see if the user is logged in.
- Give the Topic model a field in that can store a users id.
Let’s start with the user model:
var mongoose = require('mongoose');

var UserSchema = new mongoose.Schema({
    username: {type: String, unique: true, required: true},
    password: {type: String, required: true}
});

module.exports = mongoose.model('User', UserSchema);
This is the basic UserSchema, but here’s the problem: we want to make this as secure as possible, so we can’t store our user’s password as plain text. We need an encryption system:
$ npm install bcrypt-nodejs --save
We want to add the following after our UserSchema variable and before our exported model:
var bcrypt = require('bcrypt-nodejs');

UserSchema.pre('save', function(callback) {
    var user = this;
    if (!user.isModified('password')){
        return callback();
    }
    bcrypt.genSalt(5, function(err, salt){
        if(err) {
            return callback(err);
        }
        bcrypt.hash(user.password, salt, null, function(err, hash) {
            if (err) {
                return callback(err);
            }
            user.password = hash;
            callback();
        });
    });
});

UserSchema.methods.verifyPassword = function(password, cb) {
    bcrypt.compare(password, this.password, function(err, isMatch){
        if(err){
            return cb(err);
        }
        cb(null, isMatch);
    });
};
The pre function is a way to ensure that the following code is executed when another function is called. In this case we are making sure that when we save a user and the password is being modified or new, then we are encrypting the plaintext password before. We also add in a method called verifyPassword. This is what we are going to use during login, and if the callback returns error-free, then the user is good to go.
Passport
Passport is an authentication system middleware for express. It has many different authentication strategies, and we can even use facebook, google, github, etc authentication if we want. For now we are going to start out with a local strategy. Let’s create our authentication controller.
First let’s get passport and related dependencies:
npm install passport passport-local --save
Now we create our auth controller:
// /app/controllers/auth.js

var passport = require('passport');
var LocalStrategy = require('passport-local').Strategy;
var User = require('../models/user');

passport.use(new LocalStrategy(
    function(username, password, callback) {
        User.findOne({username: username}, function(err, user){
            if(err){
                console.log(err);
                return callback(err);
            }
            if(!user){
                console.log(false);
                return callback(null, false, { message : 'invalid e-mail address or password' });
            }
            user.verifyPassword(password, function(err, isMatch){
                if(err){
                    console.log(callback(err));
                    return callback(err);
                }
                if(!isMatch) {
                    console.log(console(null, false));
                    return callback(null, false);
                }
                console.log(null, user);
                return callback(null, user);
            });
        });
    }
));

passport.serializeUser(function(user, done){
  done(null, user.id);
});

passport.deserializeUser(function(id, done){
  User.findById(id, function(err, user){
    done(err, user);
  });
});

exports.isAuthenticated = passport.authenticate('local', {
    successRedirect: '/',
    failureRedirect: '/'
});

exports.passport = passport;
Ok so what we are doing in this file is:
- Telling passport to use a Local strategy
- When the authenticate function is called it checks the database for users of the same username, and verifies the password (from our User model).
- We also define our serializeUser and deserializeUser which does some backend work for our passport session. If you want to read more about how this works check out this.
- We export our configured passport and our isAuthenticated function so we can use it in our routes and server.js file.
Authentication routes
Let’s create our authentication routes:
// /app/routes/auth.js
// Load express and create our authentication router
var express = require('express');
var router = express.Router();
// import our authentication controller and our user model
var authController = require('../controllers/auth');
var User = require('../models/user');
// this function takes in a request and checks if it is coming from an authenticated source (a user that is already logged in)
function authenticated(req, res, next){
if(req.isAuthenticated()){
return next();
}
console.log("Not Authorized");
res.json({success: false, msg: "Authentication Error"});
}
// /signup route will allow post requests to create new users
router.route('/signup')
.post(function(req, res){
if(!req.body.username || !req.body.password) {
res.json({success: false, msg: 'Please pass name and password.'});
} else {
var newUser = new User({
username: req.body.username,
password: req.body.password
});
newUser.save(function(err){
if(err){
return res.json({success: false, msg:err.code});
}
res.json({success: true, msg: 'New user created.'});
});
}
});
// /login route will allow post requests to login
// notice that we are handling errors manually if the authentication fails.
router.route('/login')
.post(function(req, res, next) {
authController.passport.authenticate('local', function(err, user, info) {
if (err) {
return next(err); // will generate a 500 error
}
if (! user) {
return res.send({ success : false, message : 'authentication failed' });
}
req.login(user, loginErr => {
if (loginErr) {
return next(loginErr);
}
return res.send({ success : true, message : 'authentication succeeded' });
});
})(req, res, next);
});
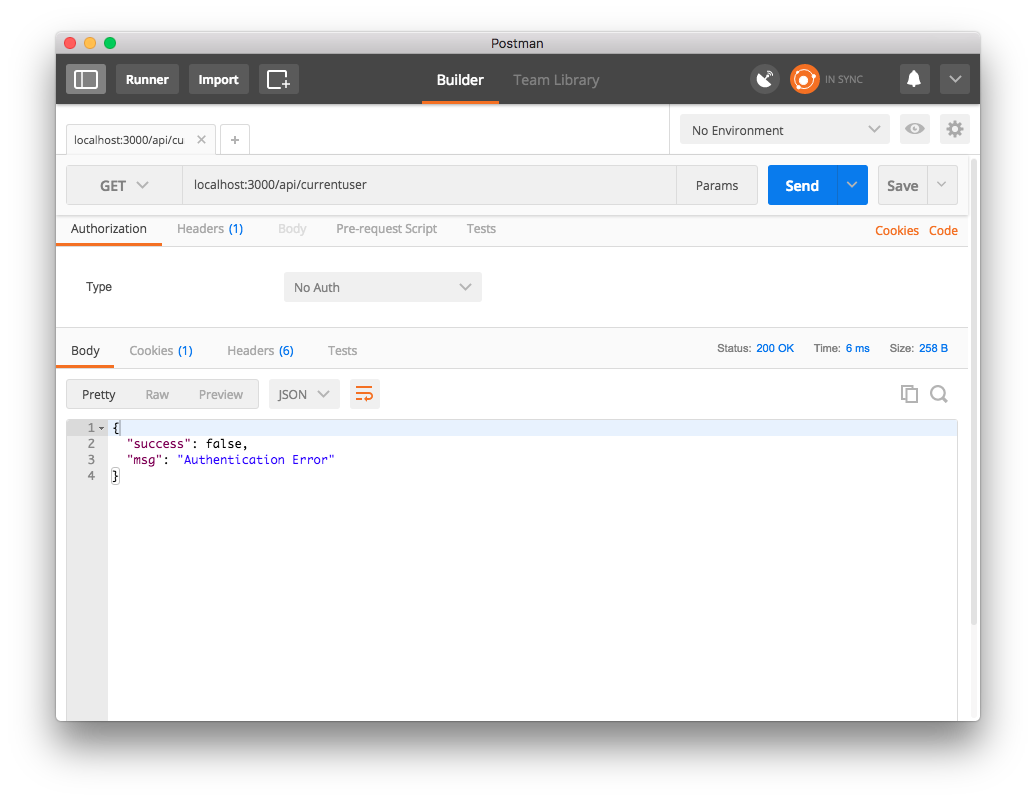
// /currentuser route will use our authenticated function to check if we are logged in, and send the current user if so
router.route('/currentuser')
.get(authenticated, function(req, res){
res.json(req.user);
});
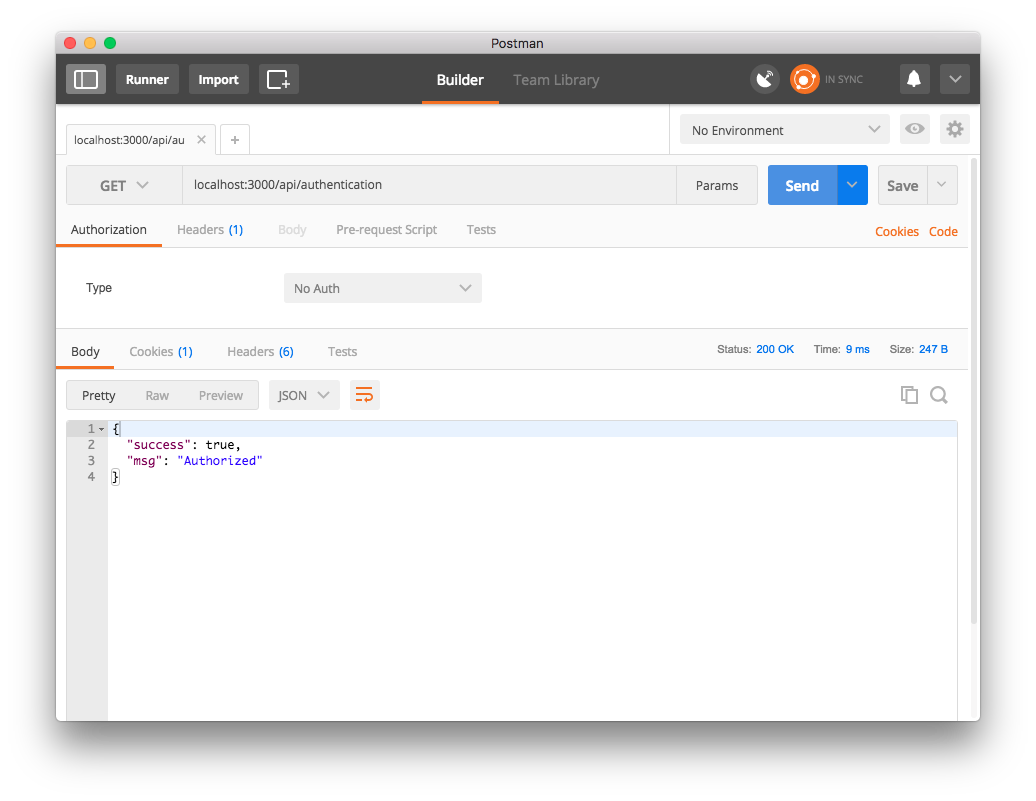
// /authentication is an easy get request to return a success message if the user to authorized, we will use this to check if certain pages should be accessible
router.route('/authentication')
.get(authenticated, function(req, res){
console.log("Authorized");
res.json({success: true, msg: 'Authorized'});
});
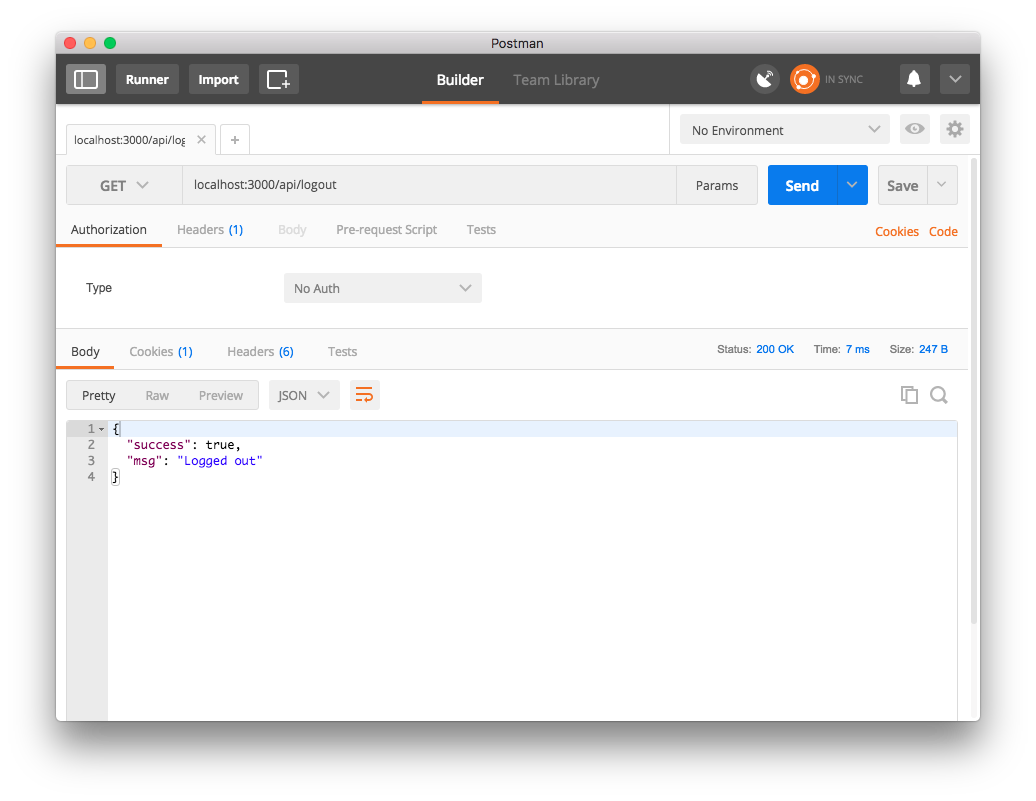
// /logout will allow the user to logout and destroy their session
router.route('/logout')
.get(function(req, res){
console.log('logout');
req.logout();
res.json({success: true, msg: 'Logged out'});
});
// export our router so that we can use it in server.js
exports.authRouter = router;
Lastly we need to use our authentication router in our server.js file, along with add a couple dependencies to help us with express sessions:
Getting the cookie-parser and express-session dependencies:
$ npm install cookie-parser express-session --save
Updating our server.js:
// Dependencies
var express = require('express');
...
var passport = require('passport');
var cookieParser = require('cookie-parser');
var session = require('express-session');
...
// Import our Routers
var topicRouter = require('./app/routes/topic');
var authRouter = require('./app/routes/auth');

// Tell our app to use our dependencies
app.use(session({
	secret: 'secret',
	resave: true,
	saveUninitialized: true
}));
app.use(bodyParser.urlencoded({ extended: true }));
app.use(bodyParser.json());
app.use(cookieParser());
app.use(passport.initialize());
app.use(passport.session());

// tell our router to use our imported routes
router.use(topicRouter.topicRouter);
router.use(authRouter.authRouter);
...
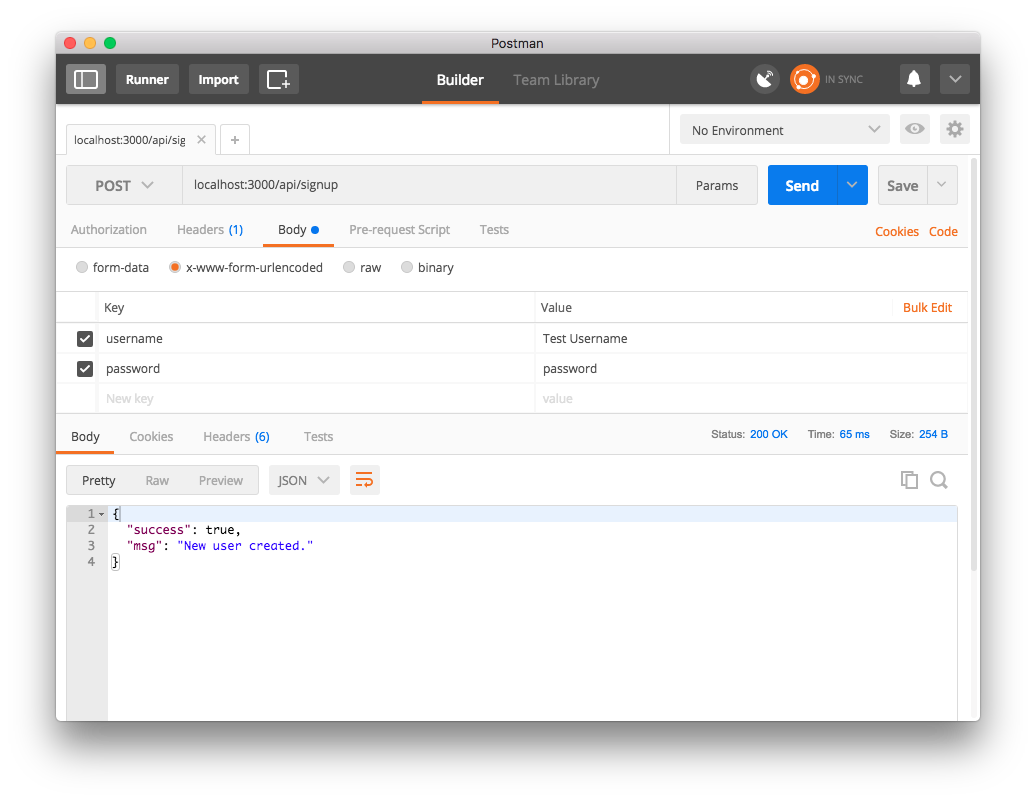
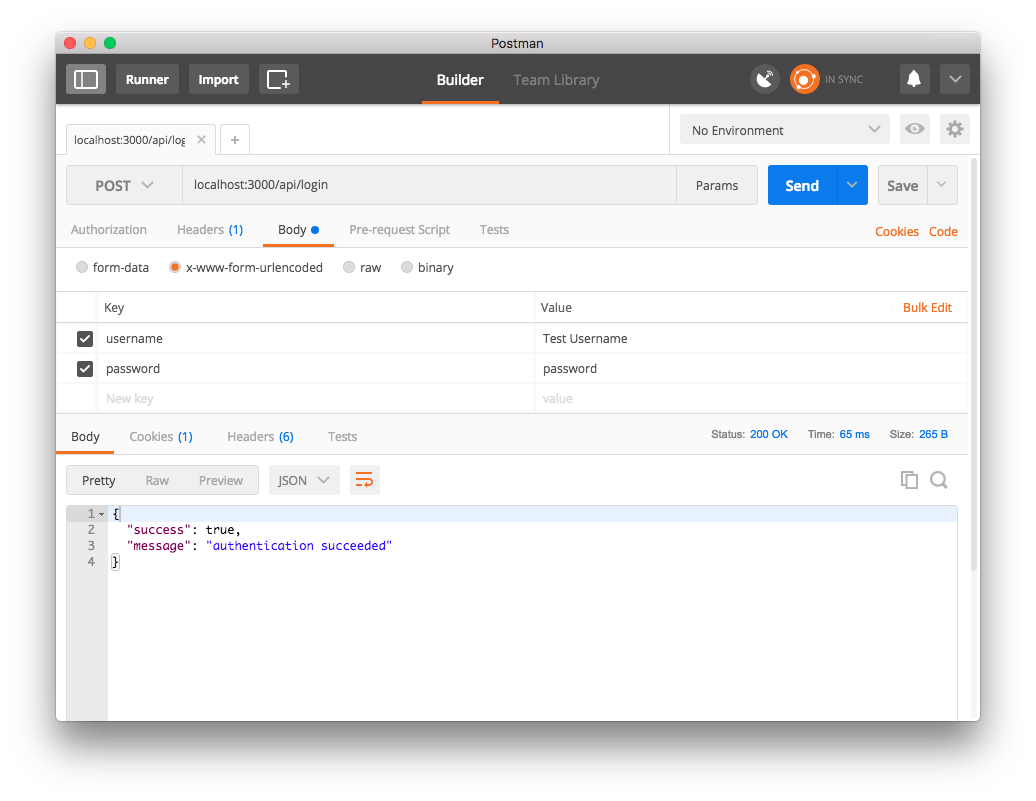
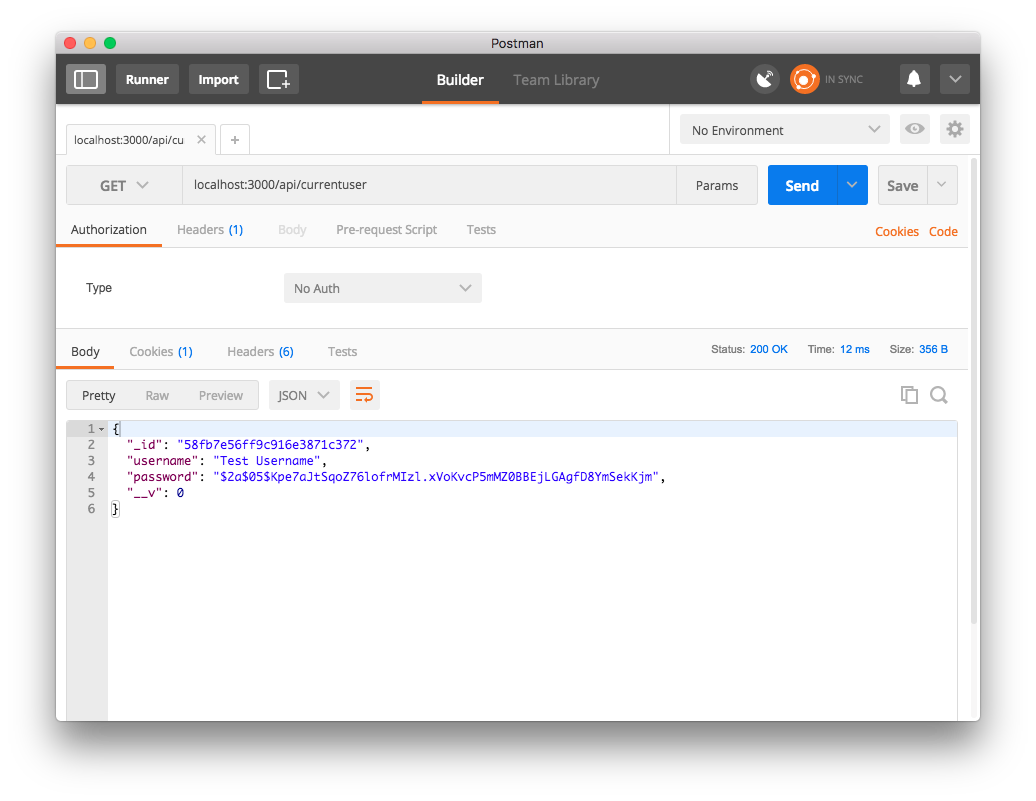
Now when we run our server we can:
Signup:
Login:
Check our user information:
Check our authentication:
Logout:
And get denied when we try to see our user info after we logout:
High five.
Tying together Topic and User
We are nearing the end of our backend programming journey, but first we need to tie everything together. This means that we only want users to be able to create topics, not everyone. So we are going to change up our topic routes slightly in order to prevent the unauthorized from CRUD-ing topics:
// /app/routes/topic.js

// Import our dependencies and create our router for topics
var express = require('express');
var router = express.Router();

// Import our topic controller
var topicController = require('../controllers/topic');

function authenticated(req, res, next){
    if(req.isAuthenticated()){
        return next();
    }
    res.json({success: false, msg: "Authentication Error"});
}

// create /topics route
router.route('/topics')
    .post(authenticated, topicController.postTopic)
    .get(authenticated, topicController.getTopics);

// create /topics/:topic_id route
router.route('/topics/:topic_id')
    .get(authenticated, topicController.getTopic)
    .put(authenticated, topicController.putTopic)
    .delete(authenticated, topicController.deleteTopic);

exports.topicRouter = router;
What we have done here is added a middleware function to check that our request is coming from an authenticated source. This only helps a little though. It just means that we need a user account to be able to update and remove other people’s topics that they post. The way we fix this is by binding a user ID to a topic when they are created, and only allow update and deletion to topics that possess the same user ID as the signed in user. To do this we are updating our Topic model and controller:
Model:
// app/models/topic.js
var mongoose = require('mongoose');

var TopicSchema = new mongoose.Schema({
    title: {type: String, required: true, index: {unique: true}},
    category: {type: String},
    userId: {type: String}
});

module.exports = mongoose.model('Topic', TopicSchema);
We have added a userId field of type String. This will store the userId when Topics are created.
Controller:
var Topic = require('../models/topic');

exports.postTopic = function(req, res){
    var topic = new Topic();
    topic.title = req.body.title;
    topic.category = req.body.category;
    topic.userId = req.user._id;

    topic.save(function(err) {
        if(err){
            res.send(err);
            return;
        }
        res.json({message: 'Topic added to database', data: topic});
    });
};

exports.getTopics = function(req, res) {
    Topic.find(function(err, topics) {
        if(err) {
            res.send(err);
            return;
        }
        res.json(topics);
    });
};

exports.getTopic = function(req, res) {
    Topic.findById(req.params.topic_id, function(err, topic) {
        if(err){
            res.send(err);
            return;
        }
        res.json(topic);
    });
};

exports.putTopic = function(req, res) {
    Topic.update({userId: req.user._id, _id: req.params.topic_id}, { title: req.body.title, category: req.body.category }, function(err, num, raw){
        if(err){
            res.send(err);
            return;
        }
        res.json({message: num + ' updated'});
    });
};

exports.deleteTopic = function(req, res){
    Topic.remove({userId: req.user._id, _id: req.params.topic_id }, function(err){
        if (err){
            res.send(err);
            return;
        }
        res.json({message: 'Topic removed from database'});
    });
};
The core of this strategy is by using the req.user structure. You see when passport processes authentication, it updates req.user to hold the credentials of the user that has logged in.
Now what we have done in these functions: Post: We set the topic.userId to be the _id of the req.user structure. Put/Delete: We have the search params of the update function incorperate userId, meaning that when a put/delete request is made, only posts of the same userId are available. Get: We keep the same, since we want all users to be able to see all topics.
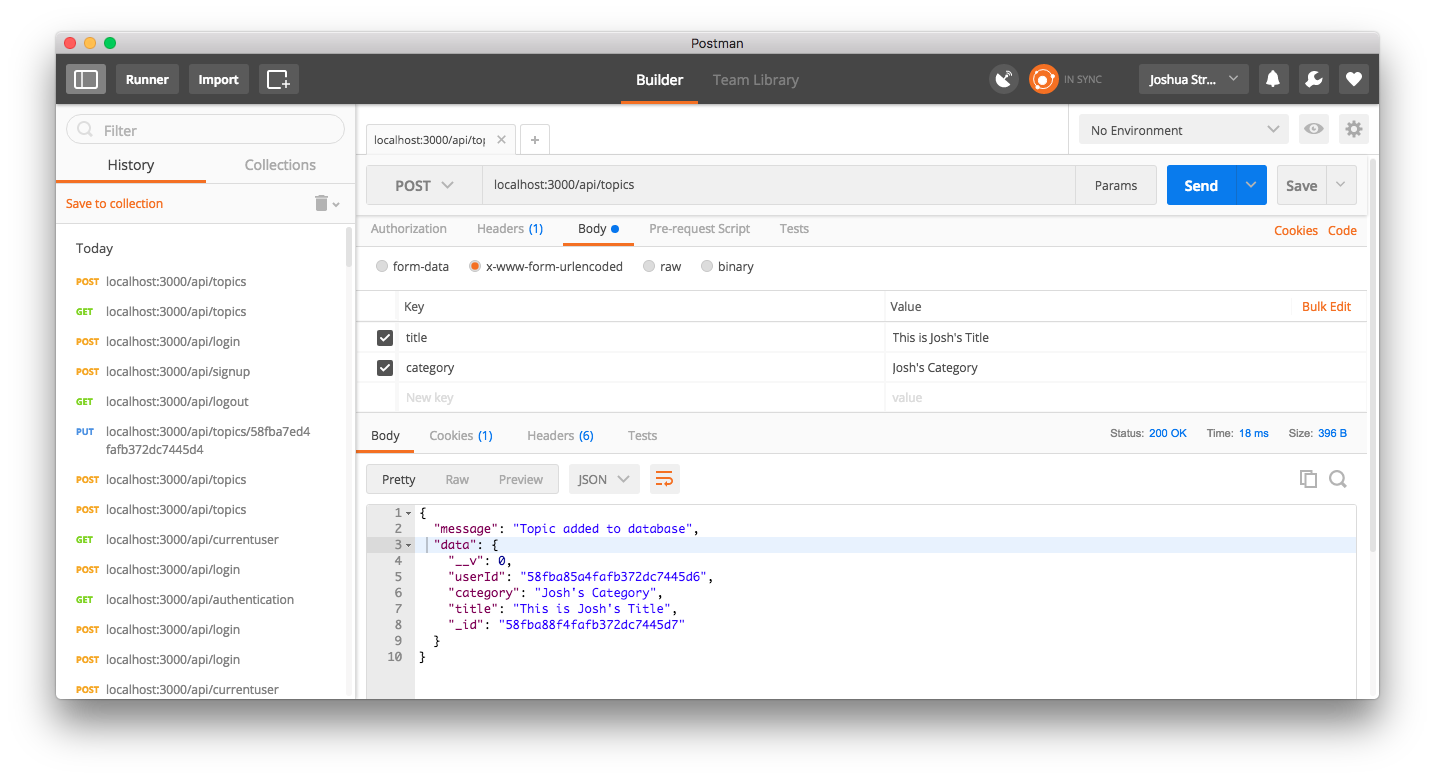
Now if you use postman and sign into a user account, you should be able to create Topics which automatically fill userId without adding any body parameters manually.
I have created two user accounts, one named “Test Username” and one named “jstreger”. I am currently logged on as “jstreger”:
I can view all of the topics, which consist of one topic created by Test Username, and one topic created by jstreger. As you can see, when I post the topics under these usernames, the userId is automatically added through req.user:
I can see all of the topics in the database:
I can’t successfully delete a topic created “Test Username” because it isn’t mine (jstreger’s) to delete (even if it still says success):
After I attempted to delete:
Ok, things are coming together nicely. There’s one more model that we need to create: the Comment.
Comments
Comments are meant to belong to topics and users simultaneously. There can be many comments to one topic, and many comments to one user. There may be a better way to design the model, controller, and routes but here is mine:
// app/models/comment.js
var mongoose = require('mongoose');
var CommentSchema = new mongoose.Schema({
    message: {type: String, required: true},
    topicId: {type: String, required: true},
    userId: {type: String, required: true},
    username: {type: String, required: true}
});

module.exports = mongoose.model('Comment', CommentSchema);
In our model we have fields for our comment’s message, topicId (the topic the comment is pinned to), and userId and username. Both userId and username might be overkill, but just precautionary. We are going to use to username to display on the website attached to each comment, and the userId will be used for req.user._id checking.
Here’s the controller:
var Comment = require('../models/comment');

exports.postComment = function(req, res){
    var comment = new Comment();
    comment.message = req.body.message;
    comment.topicId = req.body.topicId;
    comment.userId = req.user._id;
    comment.username = req.user.username;

    comment.save(function(err){
        if(err){
            res.send(err);
            return;
        }
        res.json({message: 'Comment added to the database', data: comment});
    });
};

exports.getComments = function(req, res){
    Comment.find({topicId: req.params.topic_id}, function(err, comments){
        if(err){
            res.send(err);
            return;
        }
        res.json(comments);
    });
};

exports.putComment = function(req, res) {
    Comment.update({userId: req.user._id, _id: req.params.comment_id}, {message: req.body.message}, function(err, num, raw){
        if(err){
            res.send(err);
        }
        res.json({message: num + ' updated'});
    });
};

exports.deleteComment = function(req, res) {
    Comment.remove({userId: req.user._id, _id: req.params.comment_id}, function(err){
        if(err){
            res.send(err);
        }
        res.json({message: 'Comment removed'});
    });
};
And our routes:
var express = require('express');
var router = express.Router();

var commentController = require('../controllers/comment');
var authController = require('../controllers/auth');

function authenticated(req, res, next){
    if(req.isAuthenticated()){
        return next();
    }
    res.json({success: false, msg: "Authentication Error"});
}

router.route('/comments')
    .post(authenticated, commentController.postComment)

router.route('/comments/:topic_id')
    .get(authenticated, commentController.getComments);

router.route('/comments/:comment_id')
    .put(authenticated, commentController.putComment)
    .delete(authenticated, commentController.deleteComment);

exports.commentRouter = router;
And we also make sure to update our server.js to incorperate the new comment routes:
// Dependencies
var express = require('express');
...
// Import our Routers
var topicRouter = require('./app/routes/topic');
var authRouter = require('./app/routes/auth');
var commentRouter = require('./app/routes/comment');
...
// tell our router to use our imported routes
router.use(topicRouter.topicRouter);
router.use(authRouter.authRouter);
router.use(commentRouter.commentRouter);
...
server.listen(port, ip, function(){
	var addr = server.address();
	console.log("Generic server listening at", addr.address + ":" + addr.port);
});
And voila, the backend is complete.
The Frontend
Now that we have done our backend with the M, E and N of our MEAN stack, its time to get into the last piece of the puzzle: Angular.
Warning, I literally just learned angular to do this project, please do not smite me for potentially showing you bad practices, but totally let me know and I’ll try to update.
Create a folder called client. We are going to store all of our front end files in there.
Our project directory structure should look like this now:
- app
|   |- controllers/
|   |   |- auth.js
|   |   |- comment.js
|   |   |- topic.js
|   |- models/
|   |   |- comment.js
|   |   |- topic.js
|   |   |- user.js
|   |- routes/
|   |   |- auth.js
|   |   |- comment.js
|   |   |- topic.js
- client
|
- node_modules
|   |- A bunch of stuff
- package.json
- server.js
Setup with Bower
Bower is a dependency management tool for front-end development. All you need are two files, a .bowerrc file and abower.json file. Oh and to download the dependency first
$ npm install bower --save
# for some reason the above command didn't correctly save the bower command on my path so the following worked
$ npm install bower -g
The .bowerrc file just contains configuration about where we want to put our frontend dependencies:
{
    "directory": "client/libs"
}
This means that they will be stored in a folder named libs within the client folder. Go ahead and create a libs folder within client.
Here’s what we want for bower.json:
{
    "name": "forum-example",
    "version": "0.0.0",
    "dependencies": {
        "bootstrap": "latest",
        "font-awesome": "latest",
        "animate.css": "latest",
        "angular": "latest",
        "angular-route": "latest",
        "jquery": "latest",
        "angular-ui": "latest",
        "ngstorage": "latest"
    }
}
We may not use all of these dependencies, but most are necessary. Some are for later creativity.
Installing these dependencies is as simple as:
$ bower install
After installation you can see that all of our necessary files are stored exactly where we want them
Serving Our Index
We want our website to serve a web page, we don’t want get requests through the browser. So i sort of lied about the “being done with the backend” thing. Just add this line in server.js with the other lines of app usage:
app.use(express.static(__dirname + '/client'));
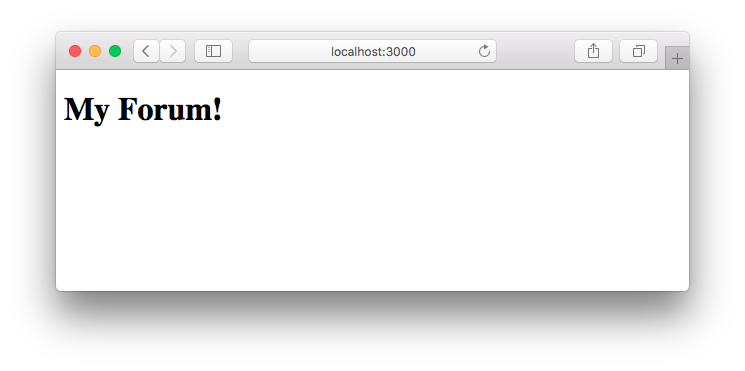
This is telling our app to start our frontend from the client folder. To test this, create a file named index.html and place the following in it:
<!-- public/index.html -->
<!doctype html>
<html lang="en">
    <head>
        <meta charset="UTF-8">
        <base href="/">
        <title>StregerDev Forum</title>
    </head>
    <body ng-app="forum">
        <h1>My Forum!</h1>
    </body>
</html>
Now when we run our server and we visit the base url of wherever our server is running, we get the following static page:
Angular Intro
You may have noticed that in our index.html, we have the tag ng-app="forum". This is a part of angular, stating that the module we are going to create and use will be called “forum”. Let’s start by including necessary files to use angular and other dependencies. Add this to the head of our html:
<!-- CSS Dependencies -->
<link rel="stylesheet" href="libs/bootstrap/dist/css/bootstrap.min.css">
<!-- Javascript Dependencies -->
<script src="libs/angular/angular.min.js"></script>
<script src="libs/angular-route/angular-route.min.js"></script>
Once we load these two dependencies, we can now use angular and we are also using a default bootstrap css base. We also get a long error in our web console:
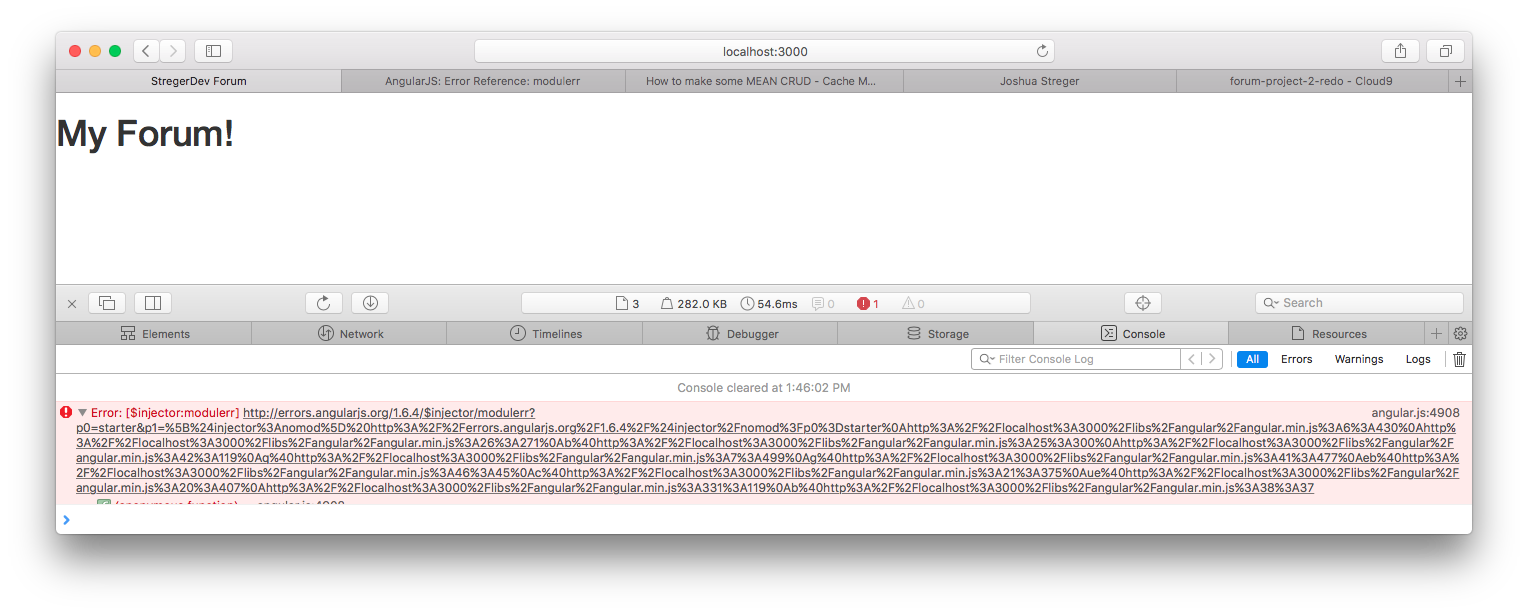
This is because we have said that the angular app we are using is “forum”, but we did not actually create an angular app called forum. Let’s do that now.
Create a new folder in client called js.
Create the following file within js:
// client/js/app.js
angular.module('forum', ['ngRoute']);
Now include it in our index.html:
<!-- Javascript Files -->
<script src="js/app.js"></script>
<script src="js/routes.js"></script>
<script src="js/controllers/HomeCtrl.js"></script>
What we have done is simply declare that angular has a module named ‘forum’, and we are using it. That error shouldn’t exist any longer, but there will be two other errors saying that routes.js and HomeCtrl.js do not exist (404). We are going to create those next.
There are 6 pages in total that we are going to make:
- Home - What people see when they first visit the site
- Login - The form to login
- Logout - The button to logout
- Register - The form to register
- Profile - The member’s profile page
- Topics - The topic board with topics and comments
Let’s start with home. Create a folder within client called “views”. Create the following home.html:
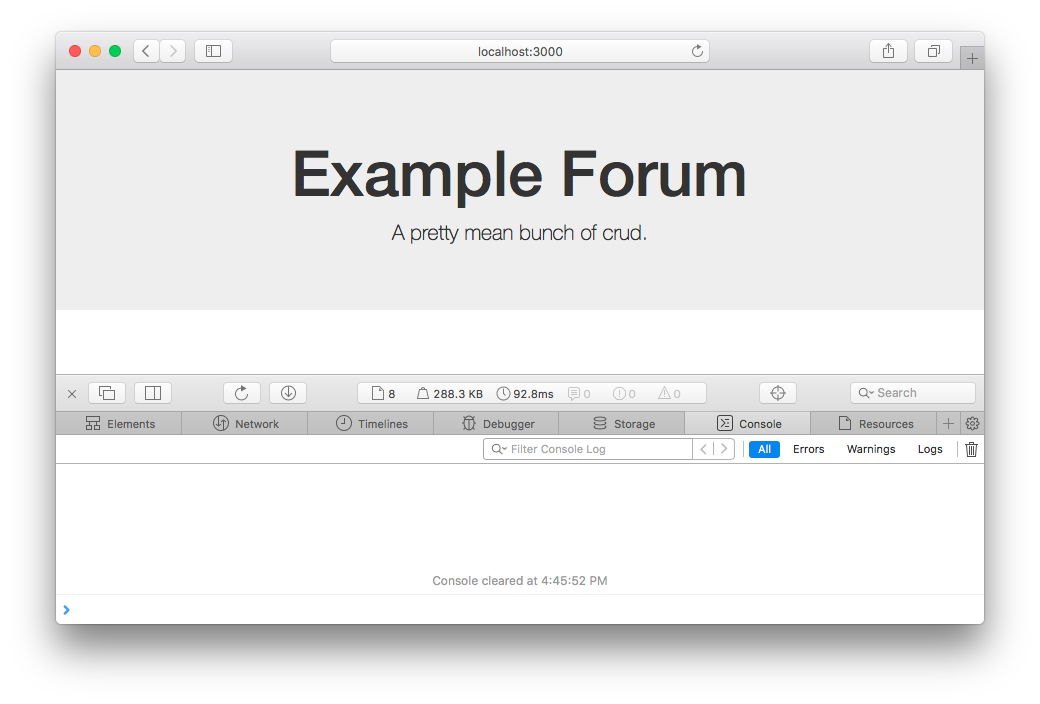
<div class="jumbotron text-center">
    <h1>Example Forum</h1>

    <p></p>
</div>
Now we have our first page, but with angular we need to create a controller that directs what’s going on in our home.html. You see there is an angular reference to tagline, which will be a variable in our controller’s scope. You’ll see. Let’s create our home controller:
Within our client/js path, create a new folder called “controllers”. Create HomeCtrl.js in that folder:
angular.module('forum').controller('HomeController', function($scope){
    $scope.tagline = "A pretty mean bunch of crud.";
});
What we are doing here is specifying that there is a controller in the module forum that is called ‘HomeController’. In this sense we can say that the scope’s tagline variable is “A pretty mean bunch of crud.” The only thing that is left is to specify that we want our index.html to use our HomeController.
Almost there, bear with me.
Create routes.js within our client/js path.
angular.module('forum').config(['$routeProvider', '$locationProvider', function($routeProvider, $locationProvider) {
    $routeProvider

        .when('/', {
            templateUrl: 'views/home.html',
            controller: 'HomeController'
        });

        $locationProvider.html5Mode(true);

}]);
This route.js file is the key to our dynamic web page. In this file we are explicitly saying which html data we want to display based on the path that is requested, as well as the controller we want to deal with the page. In this case, whenever someone requests the root webpage, we are displaying our home.html file along with its controller “HomeController”.
Note: we don’t need to add the brackets with dependencies to the second argument of angular.module because we have already declared our forum module in app.js.
After all of that nonsense, there are a couple edits to the index.html we want to perform. Mainly the inclusion of our ng-view, note the body:
<!-- public/index.html -->
<!doctype html>
<html lang="en">
    <head>
        <meta charset="UTF-8">
        <base href="/">
        <title>StregerDev Forum</title>

        <!-- CSS Dependencies -->
        <link rel="stylesheet" href="libs/bootstrap/dist/css/bootstrap.min.css">
        <!-- Javascript Dependencies -->
        <script src="libs/angular/angular.min.js"></script>
        <script src="libs/angular-route/angular-route.min.js"></script>
        <!-- Javascript Files -->
        <script src="js/app.js"></script>
        <script src="js/routes.js"></script>
        <script src="js/controllers/HomeCtrl.js"></script>

    </head>
    <body ng-app="forum">
        <div ng-view></div>
    </body>
</html>
And with that, we have our first dynamically loaded angular page:
The Views
I’m going to quickly go through the addition of the other views and controllers as well as the navigation bar for our app.
Here’s the nav bar add in:
<!doctype html>
<html lang="en">
    <head>
        <meta charset="UTF-8">
        <base href="/">
        <title>StregerDev Forum</title>
...
    </head>
    <body ng-app="forum">
        <div class="container">
            <nav class="navbar navbar-inverse">
                <div class="navbar-header">
                    <a class="navbar-brand" href="/">StregerDevForum</a>
                </div>
                <ul class="nav navbar-nav">
                    <li><a href="/topics">Topics</a></li>
                    <li><a href="/register">Register</a></li>
                    <li><a href="/login">Login</a></li>
                    <li><a href="/profile">Profile</a></li>
                    <li><a href="/logout">Logout</a></li>
                </ul>
            </nav>
            <div ng-view></div>
        </div>
    </body>
</html>
Let’s create our views!
Login (client/views/login.html):
<div class="col-md-4">
  <h1>Login</h1>
    <div class="form-group">
      <label>Username</label>
      <input type="text" class="form-control" name="username" ng-model="user.username" required>
    </div>
    <div class="form-group">
      <label>Password</label>
        <input type="password" class="form-control" name="password" ng-model="user.password" required>
      </div>
      <div>
        <button type="submit" class="btn btn-default" ng-disabled="disabled" ng-click="login()">Login</button>
      </div>
</div>
Logout (client/views/logout.html):
<div class="jumbotron text-center">
    <h1>Logout</h1>
    <p></p>
    <button class="submit" class="btn btn-default" ng-click="logout()">
        Click to Logout
    </button>
</div>
Profile (client/views/profile.html):
<div class="jumbotron text-center">
    <h1>Profile</h1>

    <p></p>
    <div>
        <button class="btn btn-default" ng-click="logout()">
            Logout
        </button>
        <button class="btn btn-default" ng-click="getInfo()">
            Get Memberinfo
        </button>
    </div>
</div>
Register (client/views/register.html):
<div class="col-md-4">
  <h1>Register</h1>
    <div class="form-group">
      <label>Username</label>
      <input type="text" class="form-control" name="username" ng-model="user.username" required>
    </div>
    <div class="form-group">
      <label>Password</label>
        <input type="password" class="form-control" name="password" ng-model="user.password" required>
      </div>
      <div>
        <button type="submit" class="btn btn-default" ng-disabled="disabled" ng-click="signup()">Login</button>
      </div>
</div>
Let’s save topics.html for later ;)
Authentication Service
Now that we have our pages, we need to create our controllers for each page. Now we can attempt to be organized and make different controllers for each thing in different files, but it might be overkill since we don’t need that much for the pages we made. In fact– Login, Logout, Register, and Profile all go under the same theme of authentication. This is where we make our authentication controller.
So in angular there are many things we can do to provide services for different things so that we arent repeating ourselves in different areas of our code.
We are going to have an Authentication Service that is called upon in our different authentication controllers.
Authentication Service (client/js/services/AuthService.js):
angular.module('forum').service('AuthenticationService', function($q, $http){

    var register = function(user) {
        return $q(function(resolve, reject) {
            $http.post('api/signup', user).then(function(result) {
                if (result.data.success){
                    resolve(result.data.msg);
                } else {
                    reject(result.data.msg);
                }
            });
        });
    }

    var login = function(user) {
    return $q(function(resolve, reject) {
      $http.post('api/loginv2', user).then(function(result) {
        if (result.data.success) {
          resolve(result.data.msg);

        } else {
          reject(result.data.msg);
        }
      });
    });
  };

  var logout = function() {
    return $q(function(resolve, reject){
        $http.get('api/logout').then(function(result){
            if(result.data.success) {
                resolve(result.data.msg);
                authorized = false;
            } else {
                reject(result.data.msg);
                authorized = false;
            }
        });
    });
  };

  var isAuthenticated = function() {
      $http.get('api/authentication').then(function(result) {
          if(result.data.success) {
              console.log("Success");
              return true;
          } else {
              console.log("Failure");
              return false;
          }
      });
  };

  return {
    login: login,
    register: register,
    logout: logout,
    isAuthenticated: isAuthenticated,
  };

});
Alright, what is going on here? Let’s break this down step by step:
First off we are creating an angular service within our forum module. A service is pretty much an object that can hold methods for us. We could technichally do the same functions within a controller, but we want to keep our processes loosely coupled. Also we will never know when we want to use the same service functions in other controllers.
angular.module('forum').service('AuthenticationService', function($q, $http){
In the second parameter of .service, you’ll see that we are using two important angular services for our authentication requests: $http and $q. These services allow us to send asynchronous get/post/put/delete requests from our frontend to any given link. In this case we will be using our authentication routes that we have created in our backend.
var register = function(user) {
        return $q(function(resolve, reject) {
            $http.post('api/signup', user).then(function(result) {
                if (result.data.success){
                    resolve(result.data.msg);
                } else {
                    reject(result.data.msg);
                }
            });
        });
    }
As you can see in this code snippet we are defining a function register that takes in a user. We make a post request to ‘api/signup’ using the data from ‘user’, and then we either resolve the promise or reject based on the success boolean we recieve back. If you can remember we have already set up the json that responds back from this post request in app/routes/auth.js.
This function set up is similar for login and logout and isAuthenticated, and they are pretty intuitive :)
Lastly in our service we want to return all of our functions so that our angular controllers can access them when needed:
  return {
    login: login,
    register: register,
    logout: logout,
    isAuthenticated: isAuthenticated,
  };
Easy peezy.
Authentication Controllers
We have created our actual views and authentication service. All that we have left is to create our Authentication Controllers to work with each page and use our service. Here is the auth controller:
angular.module('forum')
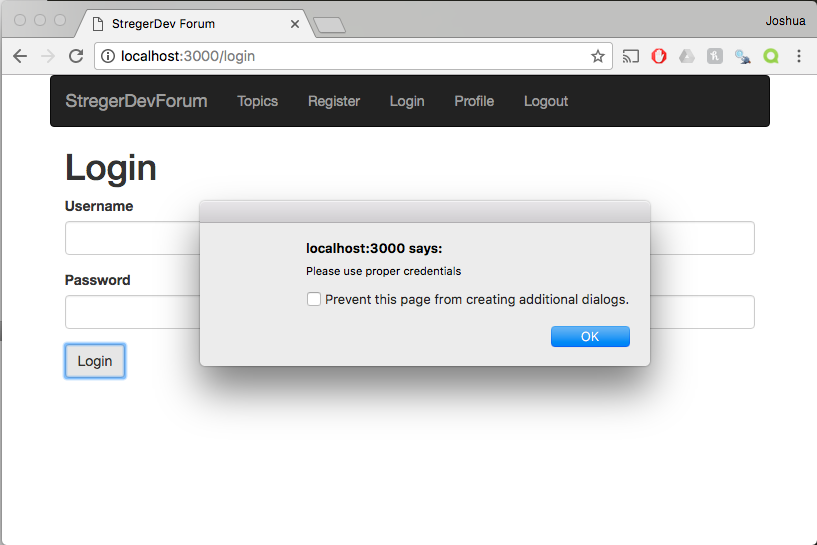
.controller('LoginCtrl', function($scope, AuthenticationService, $location) {
$scope.user = {
name: '',
password: ''
};
$scope.login = function() {
AuthenticationService.login($scope.user).then(function(msg) {
$location.path('/');
}, function(errMsg) {
var alertPopup = alert('Please use proper credentials');
});
};
})
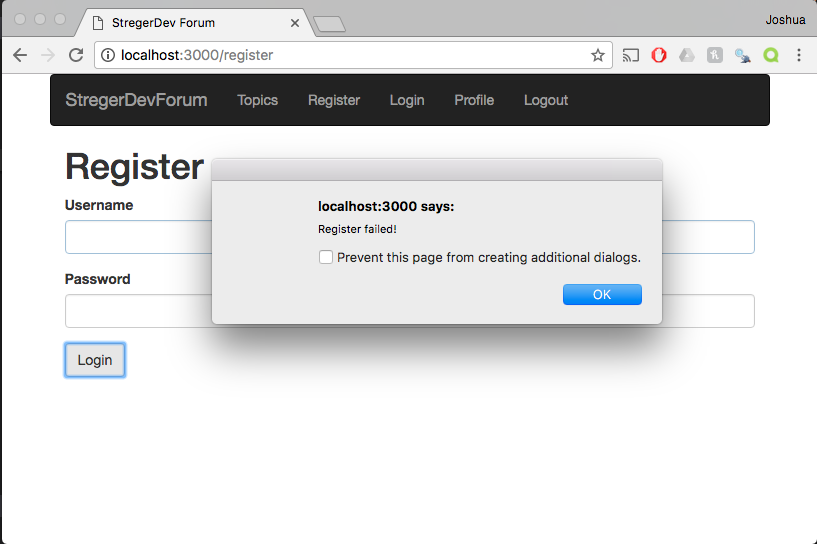
.controller('RegisterCtrl', function($scope, AuthenticationService, $location) {
$scope.user = {
name: '',
password: ''
};
$scope.signup = function() {
AuthenticationService.register($scope.user).then(function(msg) {
$location.path('/login');
var alertPopup = alert('Register success!');
}, function(errMsg) {
var alertPopup = alert('Register failed!');
});
};
})
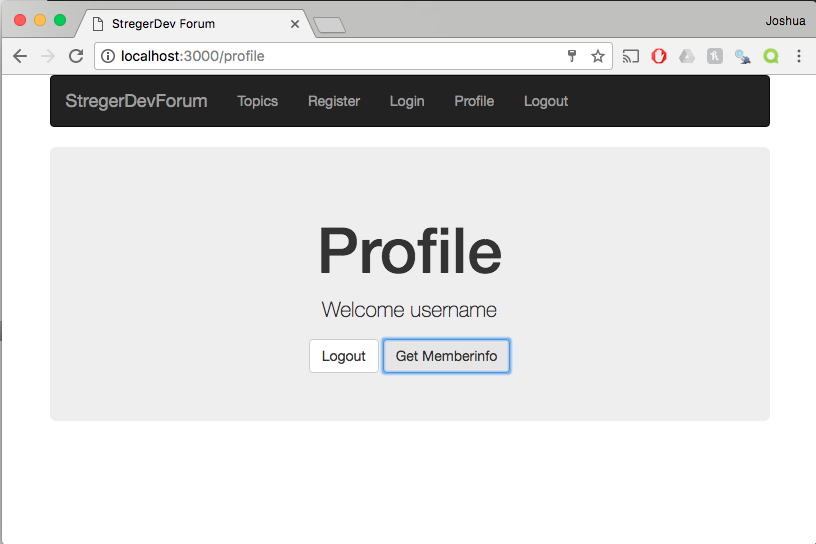
.controller('ProfileCtrl', function($scope, AuthenticationService, $http, $location) {
$scope.getInfo = function() {
$http.get('api/currentuser').then(function(result) {
$scope.memberinfo = "Welcome " + result.data.username;
});
};
$scope.logout = function() {
AuthenticationService.logout().then(function(msg) {
$location.path('/login');
var alertPopup = alert('Logout Successful');
}, function(errMsg){
var alertPopup = alert('An error occured');
});
};
});
In this file we are creating several controllers within our “forum” angular module. We create a Login, Register, and Profile controller. Each of these controllers has functions in which will be used in our view.
- LoginCtrl: User Structure in which will take in the form data when the user wants to login, and the Login function. The login function uses the AuthenticationService Login. If it is successful then the user is redirected to the home page, if not then an alert pops up.
- RegisterCtrl: User Structure in which will take in the form data when the user wants to signup, and the signup function. The signup function uses the AuthenticationService register. If it is successful then a redirect to the login screen occurs and an alert saying “Register success!”, if not then an alert occurs saying “Register Failed”
- ProfileCtrl: A function in which the user info can be requested and a logout function that uses the AuthenticationService logout, with a redirect to the login page.
Now we can update our routes.js file to incorperate these functions together.
routes.js:
angular.module('forum').config(['$routeProvider', '$locationProvider', function($routeProvider, $locationProvider) {
    $routeProvider

        .when('/', {
            templateUrl: 'views/home.html',
            controller: 'HomeController'
        })
        .when('/login', {
            templateUrl: 'views/login.html',
            controller: 'LoginCtrl'
        })
        .when('/register', {
            templateUrl: 'views/register.html',
            controller: 'RegisterCtrl'
        })
        .when('/profile', {
            templateUrl: 'views/profile.html',
            controller: 'ProfileCtrl'
        })
        .otherwise({redirectTo: '/'});

        $locationProvider.html5Mode(true);

}]);
We are setting our paths up in this file. Let’s update our index.html to incorperate all of the necessary files:
<!doctype html>
<html lang="en">
    <head>
        <meta charset="UTF-8">
        <base href="/">
        <title>StregerDev Forum</title>
        <!-- CSS Dependencies -->
        <link rel="stylesheet" href="libs/bootstrap/dist/css/bootstrap.min.css">
        <!-- Javascript Dependencies -->
        <script src="libs/angular/angular.min.js"></script>
        <script src="libs/angular-route/angular-route.min.js"></script>
        <!-- Javascript Files -->
        <script src="js/app.js"></script>
        <script src="js/routes.js"></script>
        <script src="js/services/AuthService.js"></script>
        <script src="js/controllers/HomeCtrl.js"></script>
        <script src="js/controllers/AuthCtrl.js"></script>

    </head>
    <body ng-app="forum">
        <div class="container">
            <nav class="navbar navbar-inverse">
                <div class="navbar-header">
                    <a class="navbar-brand" href="/">StregerDevForum</a>
                </div>
                <ul class="nav navbar-nav">
                    <li><a href="/topics">Topics</a></li>
                    <li><a href="/register">Register</a></li>
                    <li><a href="/login">Login</a></li>
                    <li><a href="/profile">Profile</a></li>
                    <li><a href="/logout">Logout</a></li>
                </ul>
            </nav>
            <div ng-view></div>
        </div>
    </body>
</html>
Here’s what we are lookin at:
Home Page

Register Failure
Register Success

Login Failure
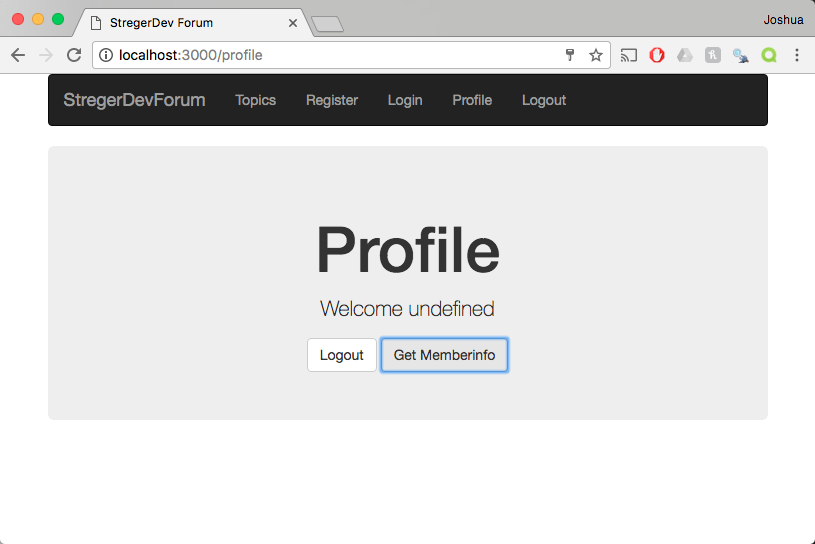
Profile Page After Login and Get Member Button
This all looks great. But there is one problem. Profile page after logout and get member button:
The problem here is that while we have authentication working, we still aren’t preventing our users from accessing pages that only logged in users should see. We don’t want our users to access the Topic or Profile pages. All we have to do is add a little something to our routes.js:
angular.module('forum').config(['$routeProvider', '$locationProvider', function($routeProvider, $locationProvider) {
    $routeProvider

        .when('/', {
            templateUrl: 'views/home.html',
            controller: 'HomeController'
        })
        .when('/login', {
            templateUrl: 'views/login.html',
            controller: 'LoginCtrl'
        })
        .when('/register', {
            templateUrl: 'views/register.html',
            controller: 'RegisterCtrl'
        })
        .when('/profile', {
            templateUrl: 'views/profile.html',
            controller: 'ProfileCtrl'
        })
        .otherwise({redirectTo: '/'});

        $locationProvider.html5Mode(true);

}]).run(function($rootScope, $http, $location, AuthenticationService) {
    $rootScope.$on('$locationChangeStart', function(event, next, current){
        $http.get('api/authentication').then(function(result) {
          if(!result.data.success) {
              var publicPages = ['/login', '/', '/register'];
                var restrictedPage = publicPages.indexOf($location.path()) === -1;
            if(restrictedPage) {
                alert("Login to Enter");
                $location.path('/login');
            }
          }
      });
    });
});
In this run function we are adding to our config, we are saying that whenever the user tries to change location, then we need to check the users authorization. If the user is not authorized, then we check to see what page he is attempting to visit. If the page is not a public access page, then we throw an alert and redirect to the login screen.
Like so:

More to Come!
This is an extremely meaty post, and I’m going to attempt to break it into smaller parts. The next steps are creating the topic page and controller as well as showing how to post the data that we want as a user. Coming soon!
Leave a Comment
Your email address will not be published. Required fields are marked *