8 - To Do App Part 2
Welcome back. In the previous tutorial we did quite a bit with our “Do It Up” application. In this tutorial we will continue where we left off. We are going to be saving data from the form, edit existing data, deleting data, adding images, and sorting data.
Quick updates
There are a few bugs that I noticed during development that we will fix now (or later)
When running the app on your mac’s iphone simulator, we do not get the same sense of the keyboard, so we still have the issue where if the keyboard pops up, it doesn’t go down on return or when touching another portion of the screen. I added the following code (the same from CrazyLib) to fix that (in TaskDetailVC.swift):
func hideKeyboardWhenTappedAround() {
    let tap: UITapGestureRecognizer = UITapGestureRecognizer(target: self, action: #selector(TaskDetailVC.dismissKeyboard))
    view.addGestureRecognizer(tap)
}

func textFieldShouldReturn(_ textField: UITextField) -> Bool {
    dismissKeyboard();
    return false
}

func dismissKeyboard() {
    view.endEditing(true)
}
and then the following inside of viewDidLoad():
titleField.delegate = self
detailField.delegate = self
hideKeyboardWhenTappedAround()
The second bug that I noticed is that we are currently loading the categories and priorities multiple times when loading the TaskDetailVC multiple times. We want the short data to only load once, save it to our context, and not load it again unless the user uninstalls and reinstalls the app. To fix this I have rearranged and added a couple conditionals in our TaskDetailVC.swift in the viewDidLoad():
override func viewDidLoad() {
    super.viewDidLoad()

    // Do any additional setup after loading the view.
    titleField.delegate = self
    detailField.delegate = self

    categoryPickerView.isHidden = true
    priorityPickerView.isHidden = true
    datePicker.isHidden = true
    selectButton.isHidden = true
    categoryPickerView.delegate = self
    priorityPickerView.delegate = self
    categoryPickerView.dataSource = self
    priorityPickerView.dataSource = self

    getCategories()
    getPriorities()

    if categoryPickerView.numberOfRows(inComponent: 0) == 0 {
        let category1 = Category(context: context)
        category1.category = "Work"
        let category2 = Category(context: context)
        category2.category = "School"
        let category3 = Category(context: context)
        category3.category = "Hobby"
        let category4 = Category(context: context)
        category4.category = "Family"
        let category5 = Category(context: context)
        category5.category = "Tech"
        let category6 = Category(context: context)
        category6.category = "Other"
        ad.saveContext()
        getCategories()
    }
    if priorityPickerView.numberOfRows(inComponent: 0) == 0 {
        let priority1 = Priority(context: context)
        priority1.priority = "High"
        let priority2 = Priority(context: context)
        priority2.priority = "Medium"
        let priority3 = Priority(context: context)
        priority3.priority = "Low"
        let priority4 = Priority(context: context)
        priority4.priority = "None"
        ad.saveContext()
        getPriorities()
    }

    hideKeyboardWhenTappedAround()
}
This way if the context has no elements within it, it loads our pre-made data and it will not again because our pickerViews will be populated next time.
Ok now let’s continue.
Saving Data
So in our Add/Edit form, we need to save the task that we create through the form textfields and selectors in our scene. They way we can do that is to first make an IBAction out of our save button. Control-Drag from the button to our TaskDetailVC to create the action:
@IBAction func savePressed(_ sender: Any) {
    // put what we want to happen in here
}
Now we have the following items to set for our new task:
- created (Date)
- details (String)
- title (String)
- due (Date)
- toCategory (Category)
- toImage (Image)
- toPriority (Priority)
To start, we will do everything but image:
@IBAction func savePressed(_ sender: Any) {
    // create our task
    let task = Task(context: context)
    // set the title
    if let title = titleField.text {
        task.title = title
    }
    // set the detail
    if let detail = detailField.text {
        task.details = detail
    }
    // set the created date
    task.created = NSDate()
    // take our date
    task.due = datePicker.date as NSDate
    // take our category and priority
    task.toCategory = categories[categoryPickerView.selectedRow(inComponent: 0)]
    task.toPriority = priorities[priorityPickerView.selectedRow(inComponent: 0)]
    // save our item
    ad.saveContext()
    // go back to the main page when we hit save
    _ = navigationController?.popViewController(animated: true)

}
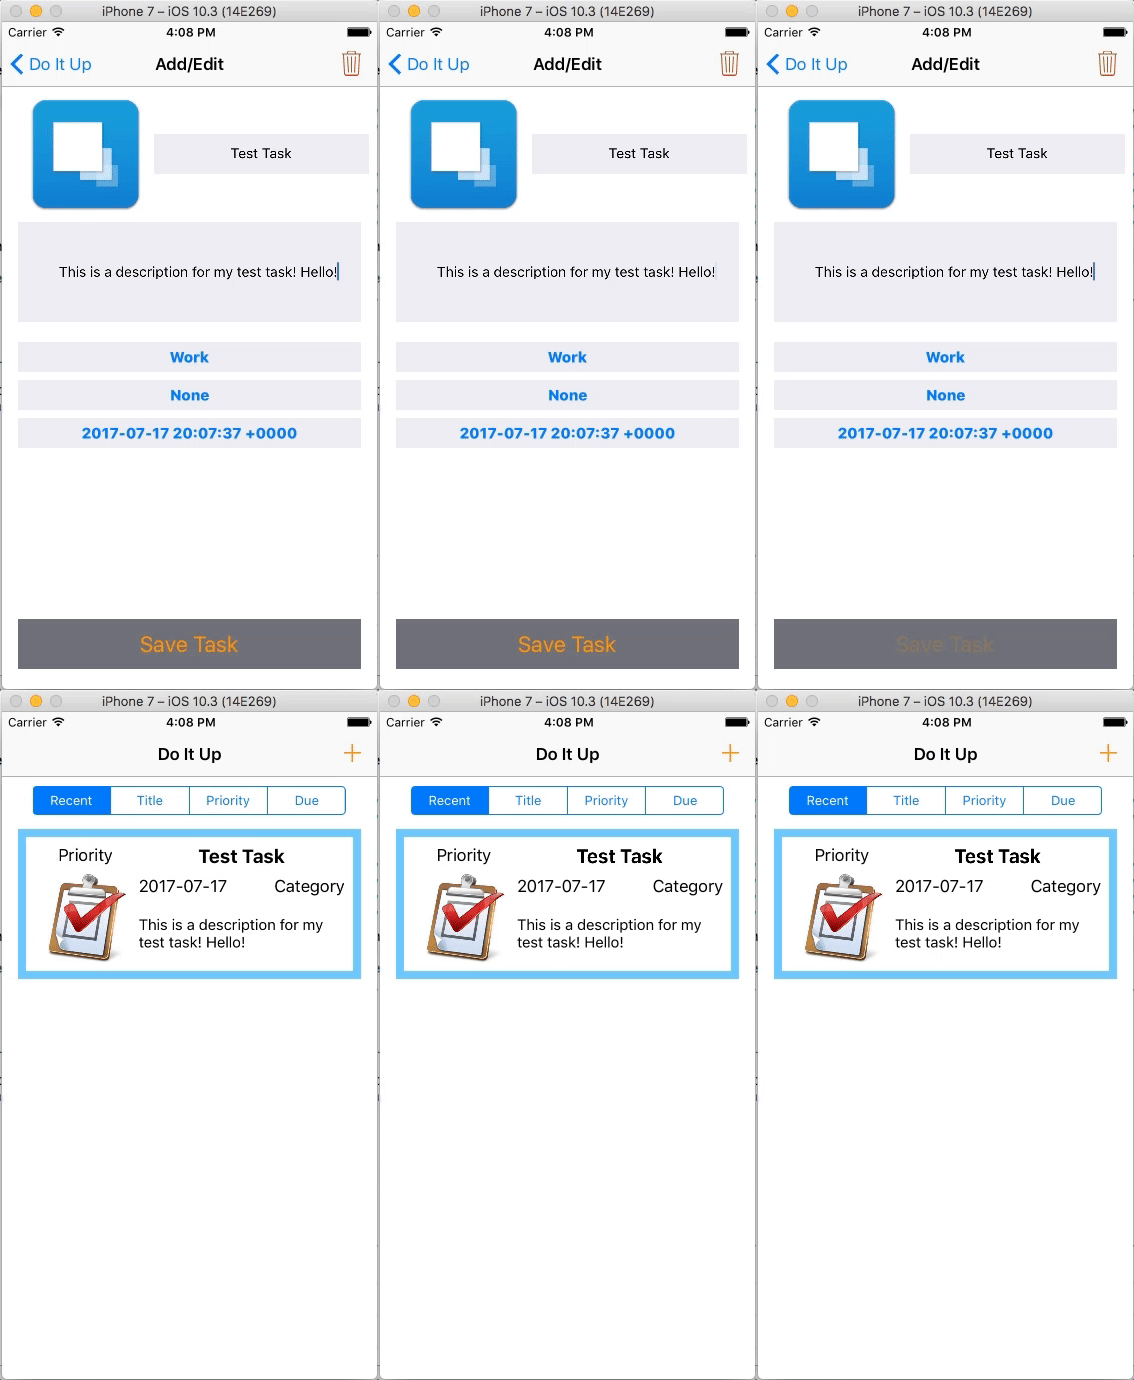
Once we have done this we can do the following:
Editing Existing Data
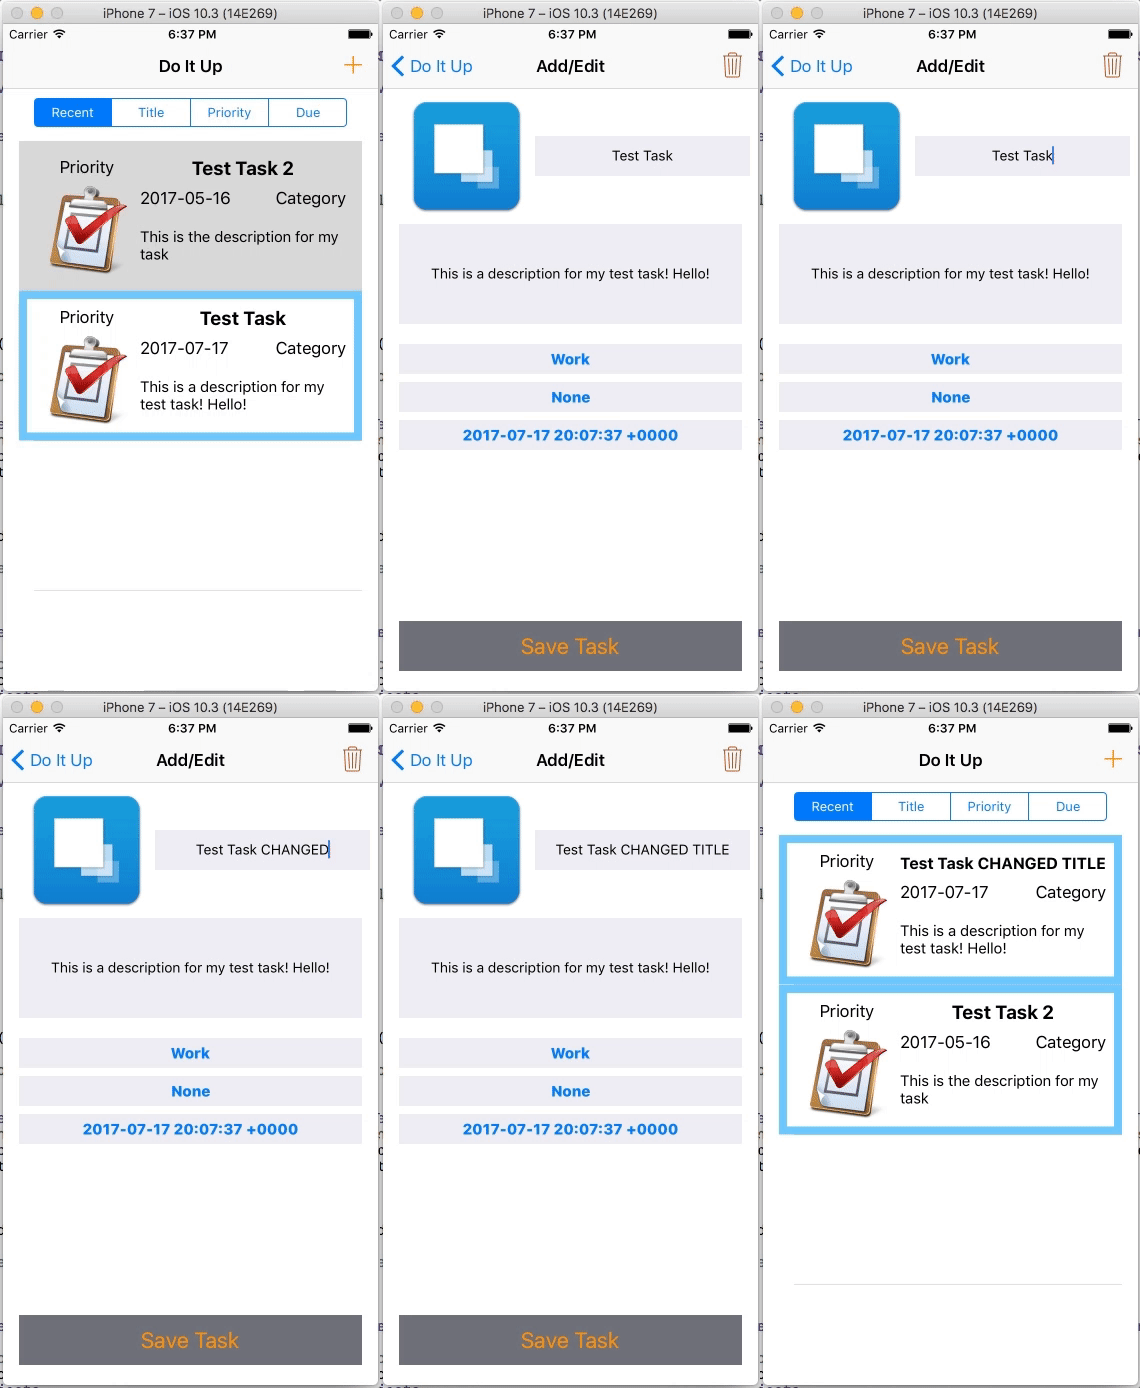
Our goal for editing existing data is being able to click on a task, open up the data in our add/edit pane, and then save the task.
Create a variable in TaskDetailVC.swift to store our task that we want to edit:
var taskEdit: Task?
In the view did load, call a function if our task is not nil (we are editing a task). The function will open up our data:
if taskEdit != nil {
    loadTaskData()
}
func loadTaskData() {
    if let task = taskEdit {
        titleField.text = task.title
        detailField.text = task.details

        if let category = task.toCategory {

            var index = 0
            for cat in categories {
                if category.category == cat.category {
                    categoryPickerView.selectRow(index, inComponent: 0, animated: false)
                    pickCategoryButton.setTitle(category.category, for: .normal)
                    break
                }
                index += 1
            }
        }

        if let priority = task.toPriority {
            var index = 0
            for prio in priorities {
                if priority.priority == prio.priority {
                    priorityPickerView.selectRow(index, inComponent: 0, animated: false)
                    pickPriorityButton.setTitle(priority.priority, for: .normal)
                    break
                }
                index += 1
            }
        }
        if task.due != nil {
            datePicker.date = task.due! as Date
            pickDueDateButton.setTitle(task.due?.description, for: .normal)
        }

    }
}
Update our savePressed to set our current task so that we do not create duplicated:
    @IBAction func savePressed(_ sender: Any) {
        // This top part is the only thing that has changed
        var task: Task!
        if taskEdit == nil {
            task = Task(context: context)
        } else {
            task = taskEdit
        }


        if let title = titleField.text {
            task.title = title
        }
        if let detail = detailField.text {
            task.details = detail
        }
        task.created = NSDate()
        task.due = datePicker.date as NSDate

        task.toCategory = categories[categoryPickerView.selectedRow(inComponent: 0)]
        task.toPriority = priorities[priorityPickerView.selectedRow(inComponent: 0)]

        ad.saveContext()

        _ = navigationController?.popViewController(animated: true)
    }
In our ViewController.swift, we need to pass the selected task through the seque to the Add/Edit scene. Make sure your identifier for your seque is “UpdateTask”. This is for the seque from the view controller itself, not the plus button.
func tableView(_ tableView: UITableView, didSelectRowAt indexPath: IndexPath) {

    if let objs = fetchedResultsController.fetchedObjects, objs.count > 0{
        let task = objs[indexPath.row]
        performSegue(withIdentifier: "UpdateTask", sender: task)
    }
}

override func prepare(for segue: UIStoryboardSegue, sender: Any?) {
    if segue.identifier == "UpdateTask" {
        if let destination = segue.destination as? TaskDetailVC {
            if let task = sender as? Task {
                destination.taskEdit = task
            }
        }
    }
}
Deleting Tasks
Very easy to do. Simply make an IBAction with the trashcan bar button in our TaskDetail Scene. Here is the function body:
@IBAction func deletePressed(_ sender: Any) {
    if taskEdit != nil {
        context.delete(taskEdit!)
        ad.saveContext()
        _ = navigationController?.popViewController(animated: true)
    }
}
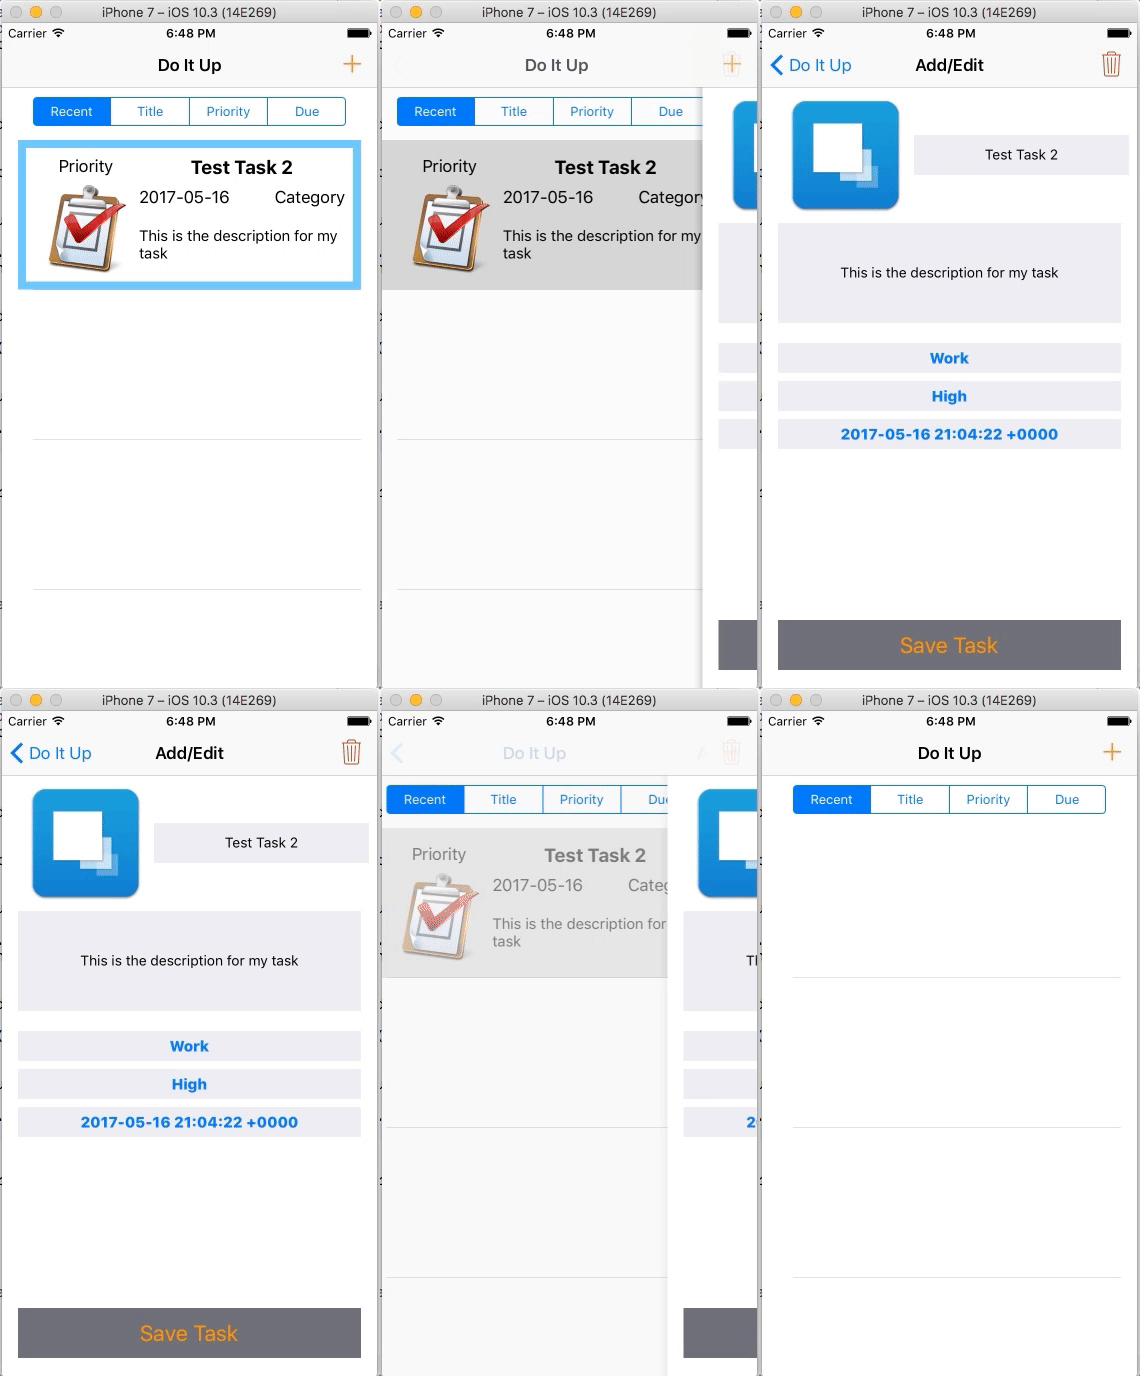
You should be able to successfully delete now:
Adding Images
Incoperate the following Delegates in our TaskDetailsVC class:
// the new ones of UIImagePickerControllerDelegate and UINavigationControllerDelegate
class TaskDetailVC: UIViewController, UIPickerViewDelegate, UIPickerViewDataSource, UITextFieldDelegate, UIImagePickerControllerDelegate, UINavigationControllerDelegate {
Create an image picker:
var imagePicker: UIImagePickerController!
In our viewdidload():
imagePicker = UIImagePickerController()
imagePicker.delegate = self
Go to info.plist. This is the file in which we are going to give information to present the user with a warning letting them know that our app is going to access their photo library:

Create a new function at the bottom of our class:
func imagePickerController(_ picker: UIImagePickerController, didFinishPickingMediaWithInfo info: [String : Any]) {
    if let image = info[UIImagePickerControllerOriginalImage] as? UIImage{
        taskImage.image = image
    }
    imagePicker.dismiss(animated: true, completion: nil)
}
Next we need to make our IBAction with our button thats hidden behind our image:
 @IBAction func addImagePressed(_ sender: Any) {
    present(imagePicker, animated: true, completion: nil)
}
Time to add it to our core data so that it remembers:
// in our savePressed():
...
let image = Image(context: context)
image.image = taskImage.image
task.toImage = image
...
// in our loadTaskData:
...
taskImage.image = task.toImage?.image as? UIImage
...
// in our TaskCell.swift within configureCell:
...
categoryLabel.text = task.toCategory?.category
priorityLabel.text = task.toPriority?.priority
taskImage.image = task.toImage?.image as? UIImage
...
Pretty neat, huh?
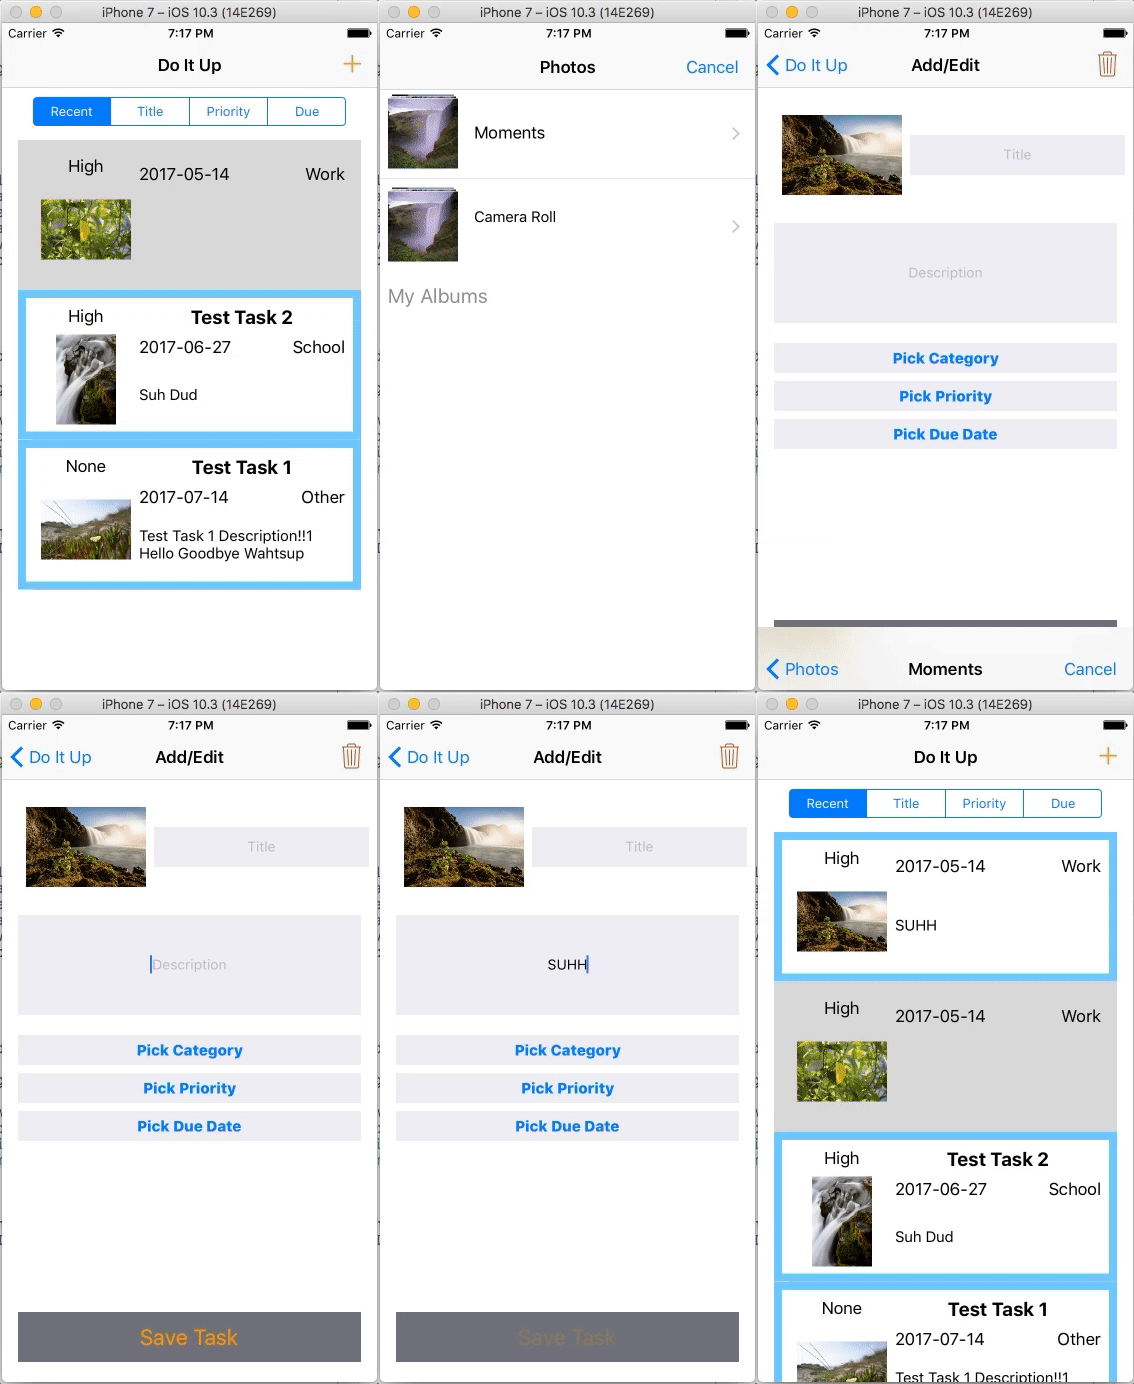
Sorting
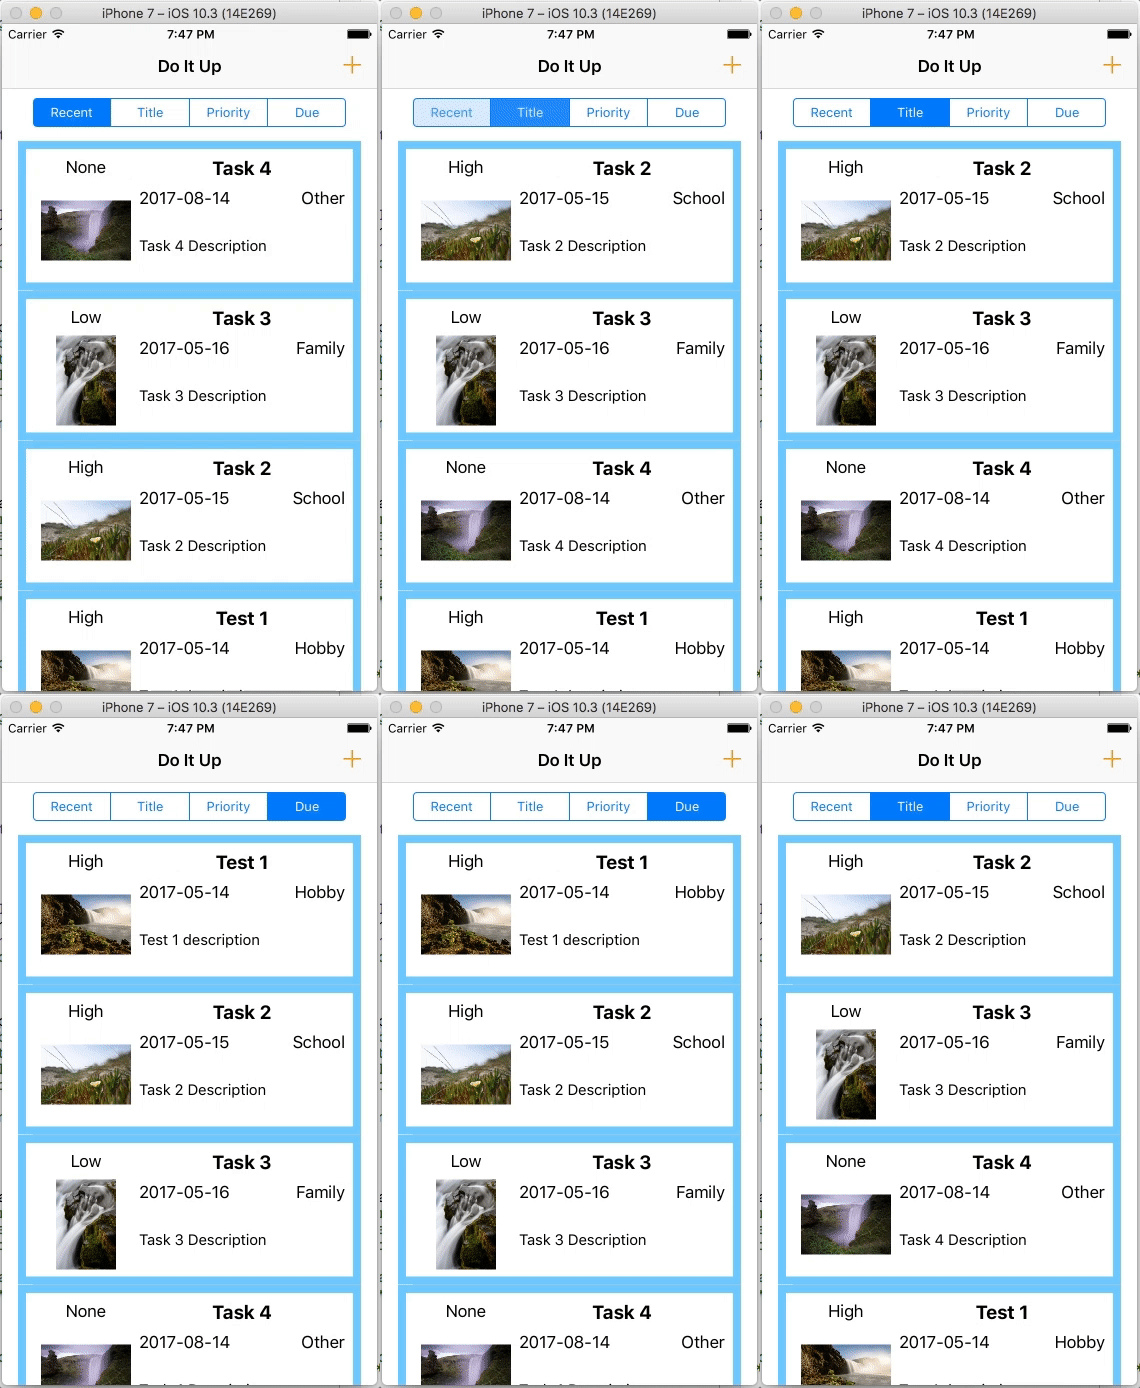
The last piece of the puzzle is to figure out our sorting segments. We have 4 so far and we have been organizing them based on recent. Time to do some other sorting schemes. We have edited our attemptFetch() as well as placed an IBAction for our segment controller:
@IBAction func segmentChange(_ sender: Any) {
    attemptFetch()
    tableView.reloadData()
}


func attemptFetch() {
    // This is our request for getting our Tasks
    let request: NSFetchRequest<Task> = Task.fetchRequest()

    // This is one of our sorting mechanisms, by date using the created portion of our Task model
    let dateSort = NSSortDescriptor(key: "created", ascending: false)
    let titleSort = NSSortDescriptor(key: "title", ascending: true)
    let dueSort = NSSortDescriptor(key: "due", ascending: true)

    // this currently doesn't work correctly, no comparator usage for core data right now :(
    let prioritySort = NSSortDescriptor(key: "toPriority.priority", ascending: true)

    if segmentController.selectedSegmentIndex == 0 {
        // setting our request to sort based on our date sort descriptor
        request.sortDescriptors = [dateSort]
    } else if segmentController.selectedSegmentIndex == 1 {
        request.sortDescriptors = [titleSort]
    } else if segmentController.selectedSegmentIndex == 2 {
        request.sortDescriptors = [prioritySort]
    } else if segmentController.selectedSegmentIndex == 3 {
        request.sortDescriptors = [dueSort]
    }


    // we create a controller to house our request that can actually perform the request
    // we also pass in our context that we made accessible in our AppDelagate.swift
    let controller = NSFetchedResultsController(fetchRequest: request, managedObjectContext: context, sectionNameKeyPath: nil, cacheName: nil)
    controller.delegate = self

    self.fetchedResultsController = controller

    do {
        // we try to perform a fetch
        try controller.performFetch()
    } catch {
        // if there is an error then we print it out
        let error = error as NSError
        print("\(error)")
    }
}
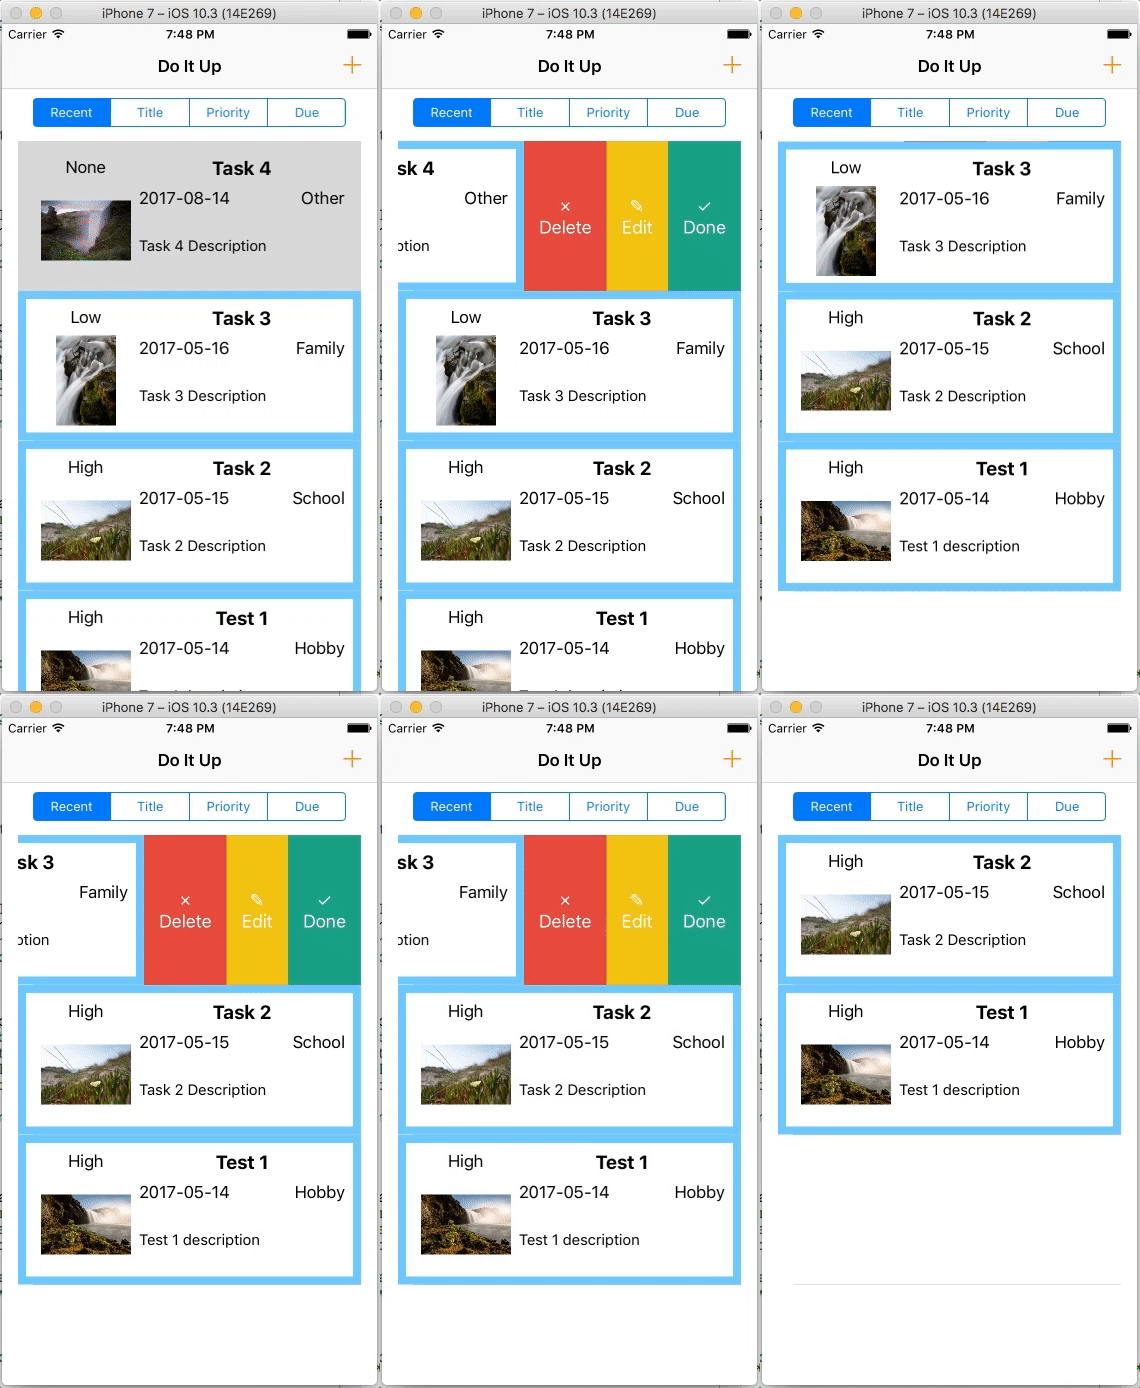
And here we go:
There are a ton of different functionalities that we can add to our app. We could make another page to edit the categories that we can choose from, or even priorities. We can incorperate actual time stamps, alarms, Push notifications, etc. I’ll leave that up to you. Here’s something extra that doesn’t take too much work ;)
